|
« The last hope built on the scorching earth. In order to protect that ideal sanctuary, the Knights of the Round Table march forth. » |
| (Bedivere) |
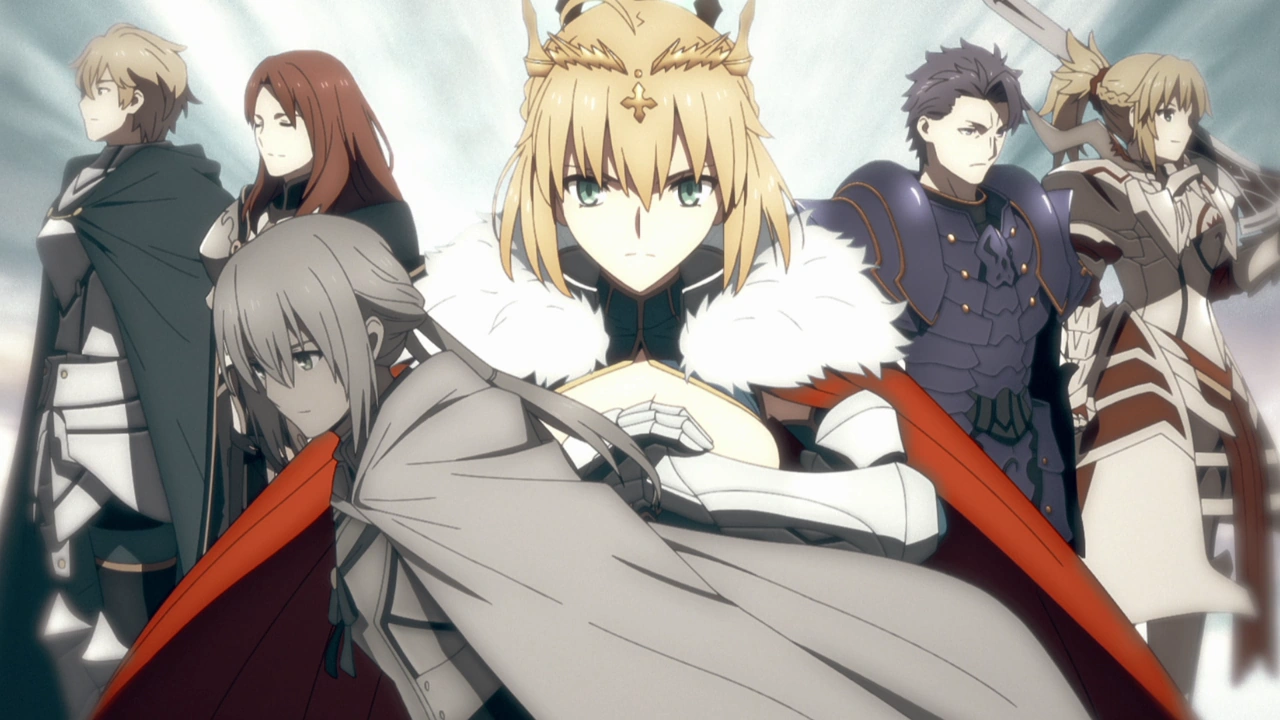
Cast of the Singularity from the Fate/Grand Order - Absolute Demonic Front: Babylonia anime.

The Sixth Singularity (第六特異点, Dairoku tokuiten?) is one of the seven singularities manifested by Beast I during the Human Order Incineration Incident. Located in 1273 AD Holy LandWP, its Humanity Foundation Value is EX and Aamon is the Demon God designated to it. It was the sixth of the seven singularites visited by Chaldea Security Organization in the undertaking of the Grand Order to restore Earth and the Human Order.
The events of Chaldea's visit to this Singularity are covered in the sixth chapter of Observer on Timeless Temple, Divine Realm of the Round Table: Camelot (神聖円卓領域 キャメロット, Shinsei entaku ryōiki Kyamerotto?). It has the subtitle The Shining Airgetlám (輝けるアガートラム, Kagayakeru Agātoramu?). It received a two-part anime film adaptation by Production I.G and Signal.MD.
Setting[]
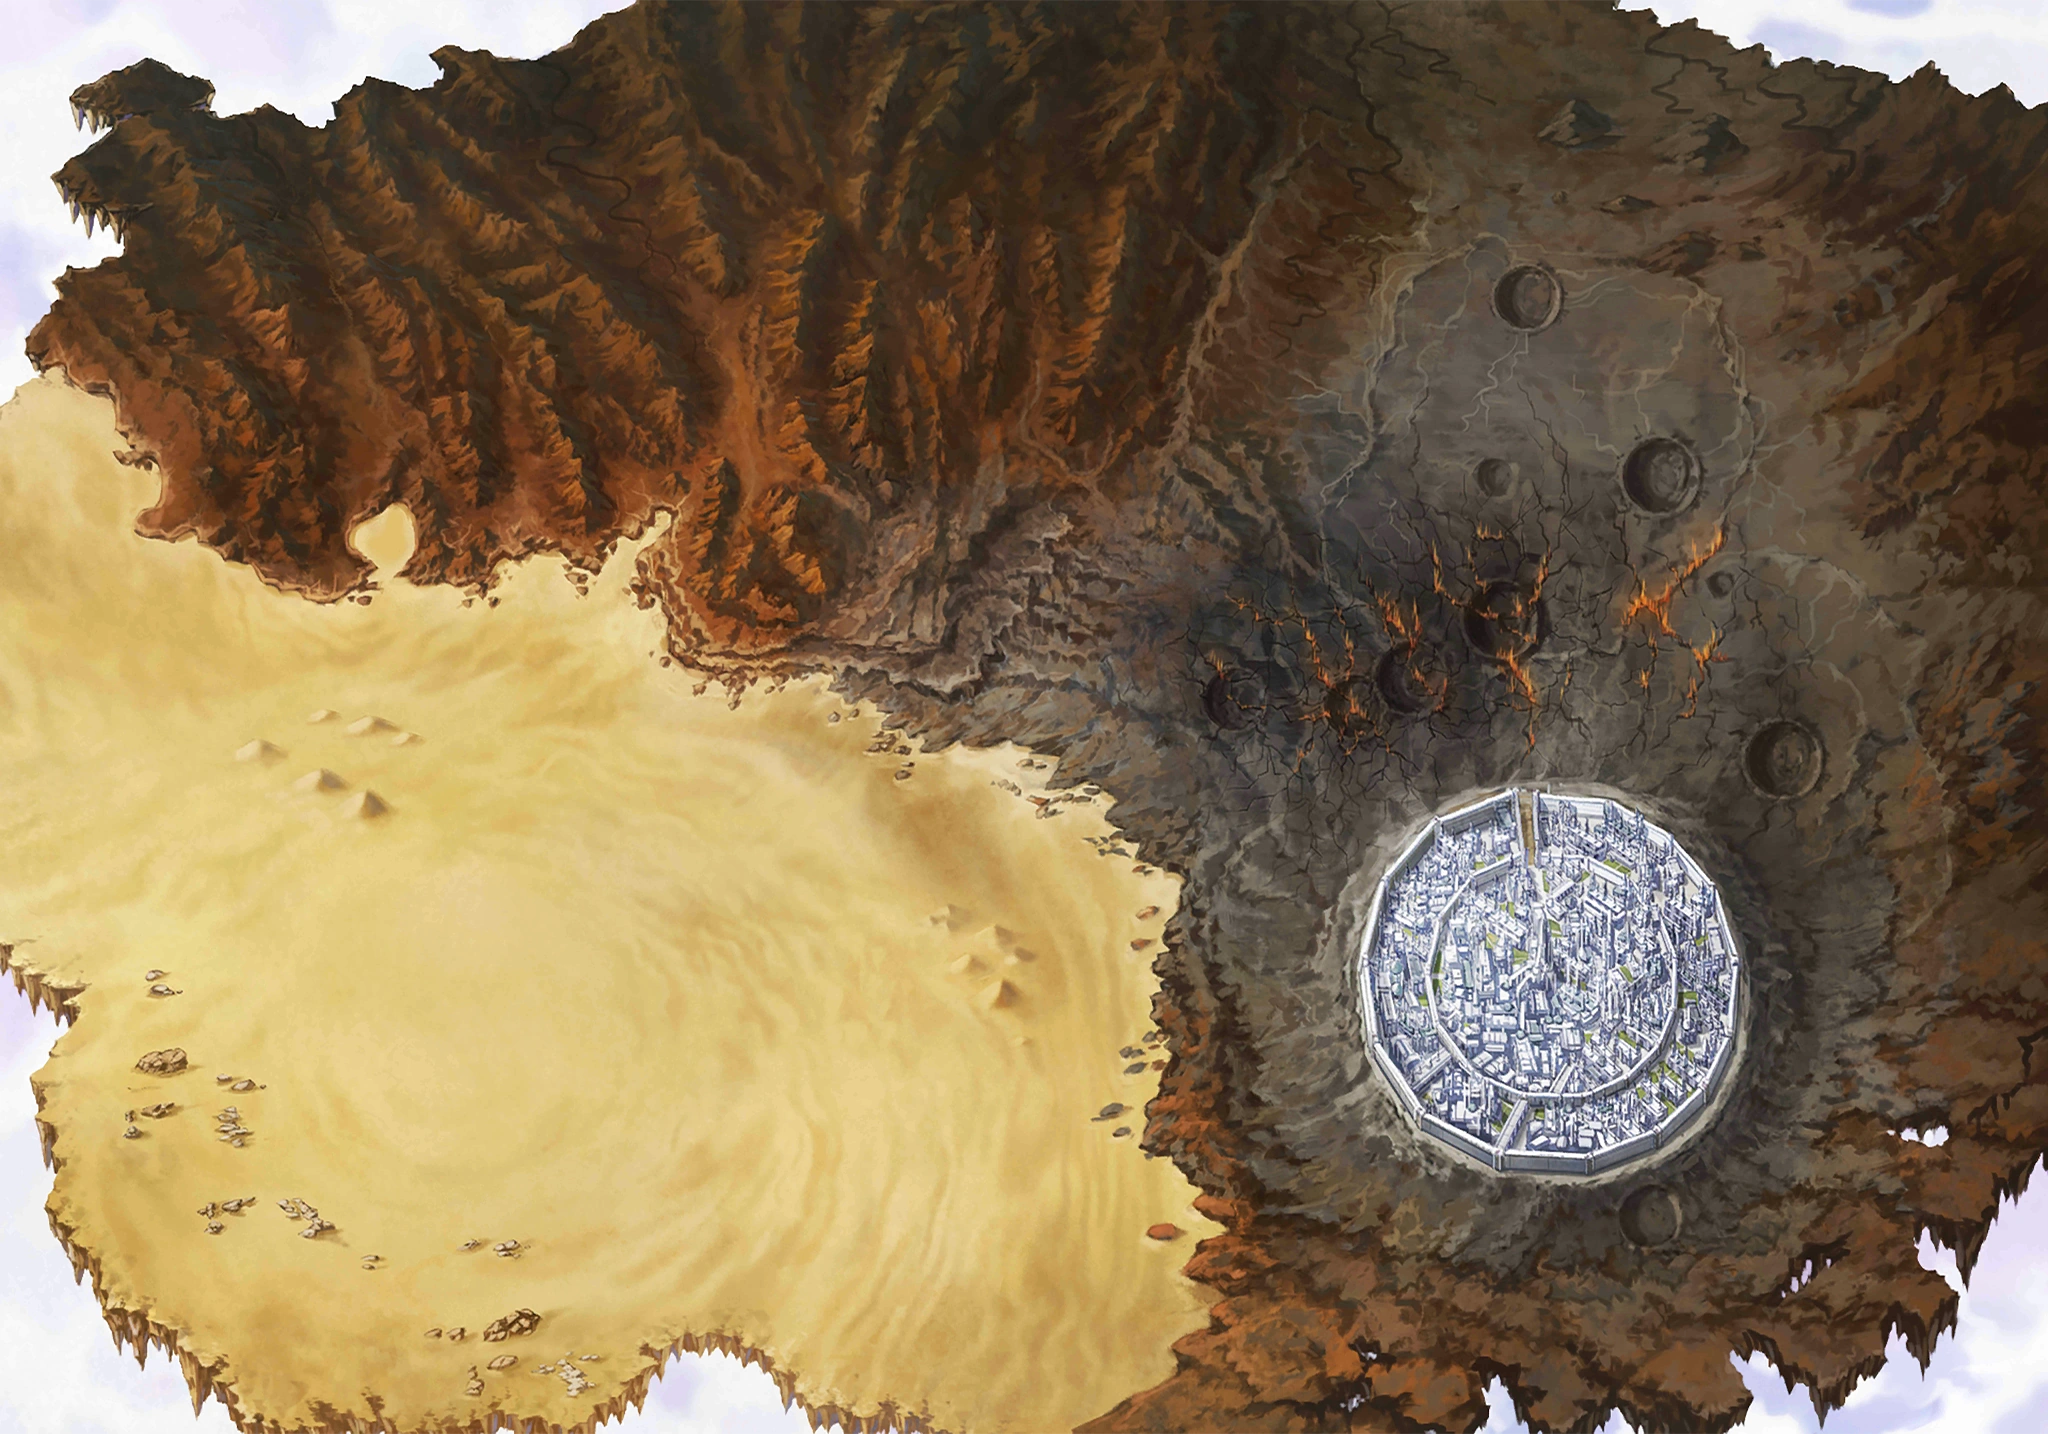
Map of the Singularity.
The Singularity was located in A.D. 1273, in the Holy Land around JerusalemWP. The roots of the Singularity lie in several events. Firstly, someone who should have died midway through the Ninth CrusadeWP was given a Holy Grail, and using its power, the expeditionary force reached the Holy Land, burning the lands and slaughtering the people living there. However, in their greed, they summoned Ozymandias who subsequently confiscated the Grail and set about building his kingdom there. Having lost the Grail, the expeditionary force lost ground and were eventually cornered by the people of the Holy Land. When they were cornered, a Servant identifying himself as Richard the Lionheart, but displaying different behavior and appearance, appeared and summoned his own crusaders. The crusaders subsequently captured the expeditionary force and occupied the Holy Land.[1]
Secondly, Bedivere did not return Excalibur to the Lady of the Lake, Artoria Pendragon was unable to die when she was fated to after the Battle of Camlann, ending up becoming a wandering ghost.[2] With Rhongomyniad still in hand, she eventually turned into a Divine Spirit, who would come to be known as the Lion King. The Lion King was aware of the incineration of humanity and planned to store a selection of human souls into Rhongomyniad to preserve humanity in some form. After arriving in the Singularity, the Lion King summoned the Knights of the Round Table (with the exceptions of Bedivere and Galahad) and told them of her plan. Aware that some of them wouldn't follow her, she gave them until sunset to decide where they stood. In the subsequent battle, the Knights who decided to follow the Lion King slaughtered their fellow knights who chose to stand against her. The Lion King then bestowed Gifts on the surviving knights, with the exception of Agravain.[1]
The Knights of the Lion King exterminated the crusaders, with the expeditionary force being annihilated along with them. During the battle with the one claiming to be Richard the Lionheart, Gareth sacrificed herself to give the others an opportunity to kill him, unable to bear the guilt of killing her fellow knights any longer. Her brother Gawain was the one who struck them both down.[1] Afterwards, the Lion King and her knights established the Holy City of Camelot in the Holy Land. This occurred about half a year before Chaldea's arrival.[2]
History[]
Prelude[]
A man, supposedly named Lucius, having travelled a long and costly journey across many worlds, is awakened by an unknown voice in an unknown land. The voice offers to grant him one last chance to fulfil his promise, but warns him that he will die after reaching the end of his journey. Lucius accepts, choosing to remain loyal to his King. [3]
With a final parting gift, and a warning that Lucius will have to face his own former allies in battle, the voice sends Lucius into the war-torn land of the Singularity - a hypothetical standing at the edge of the world. With the end of his long journey in sight, Lucius swears that he will kill his King with his own hands.[3]
A flashback shows the past of Mash Kyrielight, being raised by Dr. Romani Archaman in Chaldea as its second successful Summon Experiment. Dr. Roman's first meeting with Mash as her primary physician is shown, entering her room and calling her by her proper name for the first time. Making small conversation, they soon arrive at the topic of the Japanese terms "senpai" and "kouhai". Mash muses that if she were to have a "senpai" in life, they would be a normal and average person, who strives to do their best and never gives up - an upright human being. [3]
Roman concludes the discussion by assuring Mash that she will one day find a Senpai she can truly rely on - words that leave a strong impression on her. It is revealed that Mash is a designer baby with a pre-determined lifespan; at her first meeting with Roman, she has already been in operation for over 10 years, with a successful surgery able to give her a few more years to live, a fact she finds simple happiness in.[3]
In present-day Chaldea, while Mash herself undergoes physical adjustment, Dr. Roman reveals all he knows about Mash to Ritsuka Fujimaru. He recounts the unethical experiments surrounding her Demi-Servant status held over ten years prior - fusing between a Heroic Spirit and a human. An effort by the previous Director to reliably harness a Heroic Spirit's power, Chaldea aimed to fuse Heroic Spirits with children with both innocent souls and Magical Circuits fit for the purpose, as opposed to relics used as catalysts for summoning. [3]
Much like homunculi, children with excellent magical circuits were secretly created using artificial insemination, including Mash, with the experiments occurring several years after her birth. Despite Olga Marie's claims that the experiments failed, Roman reveals that the summoning was indeed successful, with a Heroic Spirit being summoned within Mash, the second summoned by Chaldea. However, the Heroic Spirit, apparently disgusted by the Director's actions, refused to awaken, but remained within Mash for the sake of keeping her alive.[3]
The unethicality of the experiments being proven by the Heroic Spirit's actions, they were aborted soon after, and the Director himself was found dead in his office a year later of an apparent suicide. From then, Roman received Olga Marie's permission to add Mash to the staff. It is revealed that after her father's death, Olga Marie was reluctant to give freedom to Mash, fearing that Mash would seek justified retribution for her unethical treatment by her father. [3]
Despite this, she still gave Mash her support, allowing her to roam free in Chaldea, and eventually being put onto Team A as a top-level Master Candidate. However, her fragile body meant that she could not adapt to and thus ever visit the outside world as she is. Though becoming a Demi-Servant during the Singularity F incident allows her to function in the outside world only when Rayshifting, it cannot change her predetermined lifespan.[3]
Roman concludes with the revelation that, as a rare survivor among Chaldea's designer babies, Mash will only remain alive ("operational") for another year at most, a fact that Roman believes Mash is unaware of.[3]
The staff inform them that Mash's procedure is complete, and her physical state is normal. Before Mash joins them in the Command Room, Roman asks a favour of Ritsuka to continue to interact with Mash as they always have, as their friendship has become precious and irreplaceable to her. Ritsuka reluctantly agrees, and an eavesdropping Leonardo da Vinci concurs, having planned to tell Ritsuka herself anyway. [3]
They muse on the wishful prospect of possibly sparing a Holy Grail to save Mash after the Grand Order is complete, before they are joined by Fou and a rejuvenated Mash (frazzled at being late to the briefing). With assurances that Mash is healthy and raring to go, Roman reveals the briefing's purpose - that the Sixth Singularity has been located (a fact already known by Mash thanks to an accidental leak from the staff).[3]
The Sixth Singularity is located in the Holy Land of Jerusalem, 1273 AD. The end of the Ninth Crusade, after the kingdom of Jerusalem was wiped from the map. Roman further reveals that the Singularity was detected before the North American Singularity, but the results from SHEBA's observation were highly unstable. [3]
Unlike the other Singularities, the Sixth Singularity does not exist on the surface of CHALDEAS, its section hollowed out completely, as if it were trying to leave the flow of humanity itself. While the previous Singularities were attempts to disrupt the proper history, the Sixth Singularity is attempting to become a new history that should not exist, a danger independent to the Incineration of Humanity. [3]
As such, the Foundation of Humanity value is given as EX - an indication that everything about the Singularity is totally unique and unprecedented.[3]
With a final warning from Roman that backup from Chaldea will be scarce, Ritsuka, Mash and Fou prepare for the Rayshift. Unexpectedly, an excited Da Vinci joins them in the Coffins, deciding that they will need her additional support due to the uncharted nature of the Singularity. Roman is reluctant, noting that she will be unable to return until the Singularity is resolved, but is eventually convinced.[3]
The team is ready, and with Da Vinci by their side, their next Rayshift begins.[3]
Welcomed by the Sand[]
(1/2)[]
In the grand throne room of a mighty castle, the Buddhist monk Servant, Xuanzang Sanzang, announces her intent to her patrons, the Knights of the Round Table, to leave the Knights' utopian city with her disciple Touta to pursue her own heart's desire. The Knights present consist of the noble Sir Gawain, the grim and ruthless Sir Agravain, adjutant to the King, the brash and hot-headed Sir Mordred, and the sorrowful and distant Sir Tristan, with Sir Lancelot being the only Knight absent. [4]
The Knights are reluctant to let her go, suspicious of her motives. However, as their King has already granted Sanzang approval to leave freely, the Knights allow her to respectfully take her leave, and she sets off for the desert. Agravain commands the Knights to leave Sanzang be, assuring them that although she is a foreigner, she is not the traitor prophesised by their star-seer - "When the foreign star shines, the bond of the white wall crumbles, the king's power wanes, and the divine tower falls".[4]
He foresees that the last Master of the world will soon arrive. With their King bearing the responsibility of shouldering the world, it is up to the Knights to handle other trivialities, and remain vigilant for the arrival of other foreigners.[4]
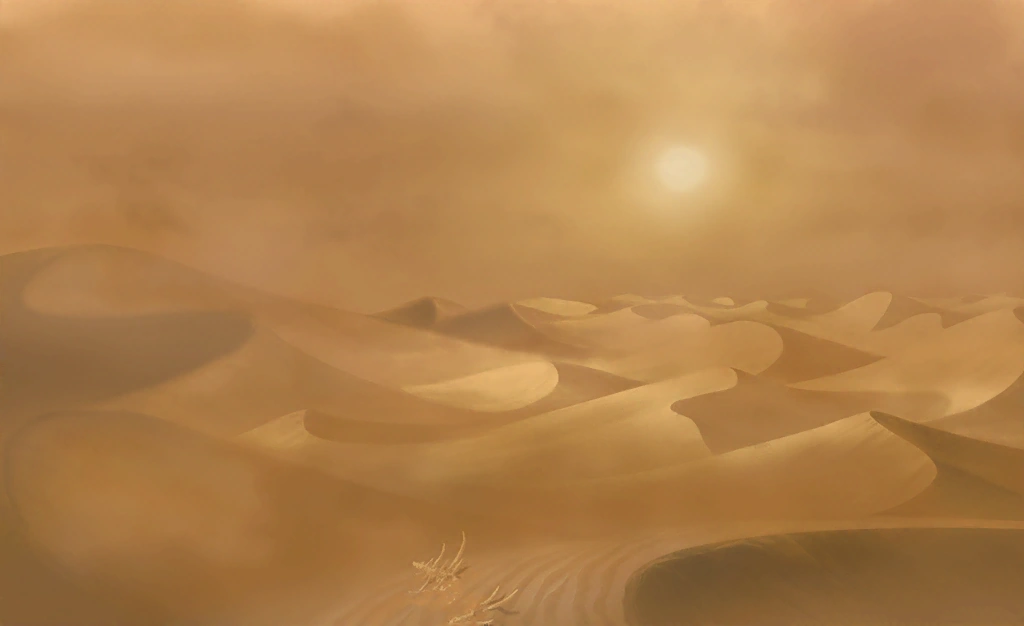

The Egyptian desert.
Meanwhile, Ritsuka, Mash, Fou and Da Vinci Rayshift into the Singularity, but unexpectedly materialize in a sandy desert in the middle of a raging sandstorm, far from Jerusalem's regular environment. Communications to Chaldea are cut off by the sandstorm, and Da Vinci believes that they were sent to the wrong era.[4]
Before they can assess the situation further, they are attacked by hostile lifeforms emerging from the sandstorm, the last oddly resembling an armour-clad knight or golem. With Da Vinci's help, they defeat the monsters. However, their respite doesn't last long, as they are attacked once again by a giant Sphinx, a powerful Phantasmal from ancient Egypt.[4]
The team manage to temporarily subdue the Sphinx, and Da Vinci detects a water source and a city to the west. They hurry away before the Sphinx can recover.[4]
(2/2)[]
The sandstorm refusing to let up, the team manage to walk 10 kilometres through the desert before Ritsuka begins having difficulty breathing. Da Vinci determines it is due to the high Mana density in the atmosphere, far too harsh for humans, and provides Ritsuka with a hastily-made Mana-blocking mask.[4]
As the team approach the water source and what appears to be a large temple just beyond the sandstorm, however, they realise that it is surrounded by dozens of Sphinxes roaming freely around the temple. With their current passage being suicidal, they turn to seek other shelter, but accidentally encounter a group of approaching figures hurrying from the temple.[4]
The ten figures are clad in skull masks, carrying a bound woman. Mistaking the heroes for human soldiers sent by the "Sun King" to rescue their captive, the Queen (the Sphinxes unable to harm them due to her presence), a fight breaks out.[4]
During the fight (the heroes ensuring to fight non-lethally), they note that Mash appears to wear armour from the "Holy City". The kidnappers' apparent leader's mask is broken, revealing her to be Hassan of the Hundred Personas (specifically, the Asako persona, the other kidnappers being other personas), an Old Man of the Mountain and Assassin Servant known to Ritsuka. [4]
Hundred Personas comically and stubbornly refuses the heroes' attempts to talk, assuming them to be working for "Ozymandias". In the chaos, Da Vinci manages to rescue their captive. Receiving reports that the Sphinxes are approaching, accompanied by groups of cloaked Medjed, Hundred Personas and her entourage are forced to flee with only stolen food. Swearing (misplaced) retribution, they escape into the sandstorm with wind-deflecting amulets.[4]
With the Assassins gone, Da Vinci unties and awakens the unconscious captive, the ancient Egyptian sorceress queen, Pharaoh Nitocris. She immediately assumes the heroes to be her kidnappers (and embarrassed at having been witnessed in and awakened from an apparently intimate dream), and attacks them with her Mirror of the Underworld.[4]
Despite the Chaldeans' attempts to convince her of the truth, Nitocris remains steadfast in her misunderstanding (further noting that Mash's armour resembles the knights of the "Holy City"). She tasks them with fighting one of her Sphinxes as a trial for atonement to gain her trust.[4]
Unexpectedly, a knight with a silver right arm arrives to assist the Chaldeans, calling himself "Lucius", a wandering Servant without a Master who was passing by. With help of Lucius' magically-empowered right arm, the heroes manage to completely destroy the Sphinx, amazing Nitocris. Da Vinci deduces Lucius' arm to be Airgetlám, the divine arm of the Celtic war god Nuadha, a Mystic of Divine Spirit class.[4]
With the battle over, Lucius confirms the heroes' story to Nitocris as a witness, finally convincing her. Embarrassed at her misunderstanding, she gives the heroes her gratitude, and asks them to escort her to her great desert nation, Ramesseum Tentyris, with the reward of its hospitality as her guests.[4]
Supper of the Sun King[]
(1/2)[]
Nitocris commands the sandstorm to cease, instantly clearing the skies, and revealing the Singularity's signature band of light and the grand temple two hours to the west. With Lucius having no business at the grand temple, he bids them farewell and takes his leave. [5]
The Chaldeans discuss "Lucius", Da Vinci wondering if Mash finds him either odd or familiar. They note that his supposed True Name of "Lucius" is odd, as Lucius was a Roman emperor who achieved almost nothing of note, and the Servant claiming his name did not appear to be an emperor. Da Vinci further deduces that "Lucius"'s Noble Phantasm Airgetlám must be a replica, as he himself is clearly not Nuadha. She wonders at the mechanism behind it, given it had enough power to defeat a near-divine-level Sphinx.[5]
Regardless, they prepare to escort an increasingly impatient Nitocris to the grand temple. She informs them that the desert is the domain of the "Sun King", a land at the end of the world. In addition, stopping the sandstorm will allow Demonic Beasts outside her control to invade, necessitating their escort. The team defend Nitocris from one such group of octopus-like Demonic Beasts.[5]
Da Vinci advises hiding their true origin from Nitocris, and claims to her that they are travelling performers carrying rare goods. However, it becomes clear that Nitocris is unaware even of what a Master is, wondering if the heroes are mountain people, or citizens of the "Holy City". Despite being a Servant, she reveals that she was summoned by the Sun King, Pharaoh Ozymandias, to work for him, superseding her duties as a Heroic Spirit.[5]
She explains that Ozymandias was uniquely summoned into the era along with his subjects and entire nation of Egypt, resulting in the land being replaced with the Egyptian desert. Ozymandias quickly rose to power and consolidated his territory, though opposed by the indigenous Saracen mountain people and the Holy City, which Da Vinci openly assumes to be Jerusalem.[5]
To their surprise, however, a now wary Nitocris reveals that the Holy Land of Jerusalem was completely destroyed, a fact that should be common knowledge to anyone within the era. Returning the sandstorm and summoning another Sphinx, Nitocris imposes another trial by combat on the Chaldeans to once again win her trust. They are given a choice to either dedicate themselves to the Sun King, or face the wastelands beyond or the "Lion King" as their final resting place.[5]
However, it is clear to the heroes that Nitocris is holding back her Sphinx's power to about 10%, and determines to not fight them herself - an act betraying her kind nature. The heroes battle the Sphinx until it retreats, passing the Trial of the Sphinx and gaining Nitocris's approval. She assures them they can now pass through the storm without fear before bidding them farewell.[5]
With safe passage secured, they set off to finally learn what is going on in the Sixth Singularity.[5]
(2/2)[]
The Chaldeans pass through the storm to behold a majestic pyramid temple complex, a floating city almost unto itself within a sea of sand. Named Ramesseum Tentyris, it is the legendary palace and Noble Phantasm of the Sun King Ozymandias, or Ramesses II, the greatest and most pharaoh of ancient Egypt.[5]
With communications still not restored, Da Vinci's hypothesis is proven that Nitocris's earlier statements were far from an exaggeration. The entire desert has been transplanted from Ozymandias's time in the BC era to the current era as a foreign body - including the atmosphere, which contains a much greater and older density of magical energy. Due to space-time itself being in disarray, Rayshifting to Jerusalem as well as communications to Chaldea are presently impossible. [5]
In addition, Da Vinci detects another distortion within the Egyptian territory - a foreign body inside a foreign body, and suspects it to be the key to their search. But with the current matter at hand before them, and the main entrance being open, they proceed into the temple to meet King Ozymandias himself.[5]
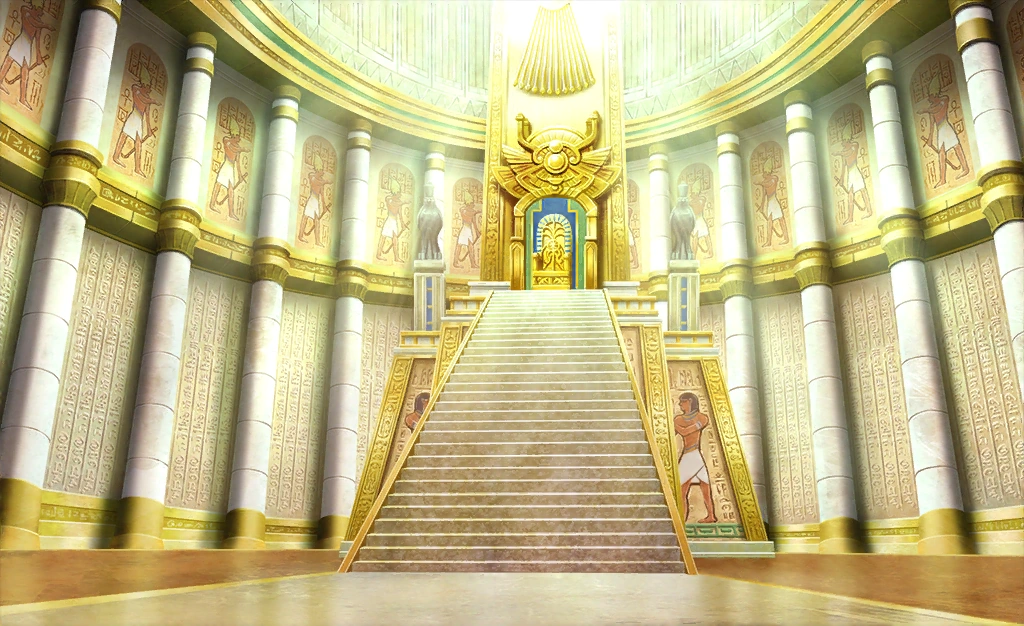

Ozymandias' throne room.
The party is brought straight to the throne room for an audience with an unexpectedly sleepy Ozymandias, Nitocris acting as his herald. Ozymandias reveals that he is already aware that the heroes are from Chaldea (noting Nitocris's apparent liking to them), as well as their exploits in the past Singularities.[5]
However, it is the source of Ozymandias's knowledge that surprises Ritsuka the most. Ozymandias immediately reveals that he possesses the Holy Grail that Chaldea is seeking. Refusing to side with the King of Mages, he seized it for himself from the Crusaders after being summoned into the era. [5]
Before he can continue further, however, the heroes are even more surprised to see Ozymandias's head begin to slide off his neck mid-sentence. Quickly righting it, the King attempts to pass it off, only for his head to nearly fall off yet again. After a tense staredown between Ozymandias and Ritsuka, the King suddenly lashes out, calling Nitocris and several fire sprites to join him in battle against Chaldea in an attempt to hide his indignity.[5]
The heroes manage to fend off Ozymandias and his entourage, and he is satisfied that his head is feeling better. He announces his intent to punish the Chaldeans as his enemies to a mortified Nitocris, knowing that as their objective is the Grail, they will inevitably try to kill him for it. However, he concedes that not telling Nitocris about the Grail earlier was his own mistake, due to believing that Chaldea would fail by the Fourth Singularity.[5]
He accuses Chaldea of being too slow - as humanity has already collapsed in the era long before their arrival. He reveals that the initial plan for the Singularity would have been a brutal war over the Holy Land, one side defending, the other invading. One side would have claimed the Holy Grail, resulting in the Holy Land becoming a seedbed for a Demon God Pillar.[5]
Da Vinci deduces that instead, the war never occurred. Ozymandias was summoned by the Crusaders, but naturally opposing them, he seized the Grail himself. However, Ozymandias further reveals that he is simply protecting the Holy Grail with no interest in the Holy Land. The true source of the Singularity and their true enemy is, in fact, a being known as the Lion King, who sits on the throne in what was once Jerusalem.[5]
Ozymandias allows the Chaldeans hospitality as his guests, but banishes them from his lands with a command to seek the Holy City. After which, they can return for one last opportunity to face him - not as guests, but as enemies. After they receive an extravagant meal, the team is escorted from the temple by Nitocris, and given materials and supplies from Ozymandias. [5]
Nitocris notes that Ozymandias has taken a liking to them, believing that Ritsuka's personality resembled an old friend of his, but warns them that they will die when they next meet. Before she leaves them, she takes a moment to compliment Mash for being able to fight with resolve despite having a fear of fighting, unlike herself.[5]
In the meantime, Da Vinci manages to construct a buggy from Ozymandias's materials - dubbing it the All-Purpose Vehicular Ornithopter Sphinx. Entirely made of wood, with no engine and running on magical energy, the team prepare for its inaugural drive across the desert, to their destination 100 kilometres to the east (after fighting off a group of stowaway monsters).[5]
To the East[]
(1/2)[]
The team make their way across the desert in the buggy, leaving the sandstorm. After Mash takes over driving from Ritsuka, Ritsuka talks with Da Vinci. She informs them that the era's original landscape is likely past the next dune. Past that point, the mana density is low enough for Ritsuka to remove their mask, and contact with Dr. Roman should be re-established.[6]
Da Vinci takes this moment to compliment Roman's efforts in running Chaldea. She reveals that since the loss of 60 staff in the Singularity F incident and contact with the outside world, Roman has worked tirelessly to keep Chaldea afloat. Far beyond his main job of managing staff health, he manages many of Chaldea's systems with little sleep, including constantly verifying Ritsuka's existence within Singularities.[6]
However, Ritsuka is unable to overlook Roman's complicity in Chaldea's past unethical experiments, especially on Mash. Da Vinci is sympathetic, revealing that she too denounced both Roman and former Director Marisbury Animusphere's (revealed as Olga Marie's father) actions after being summoned.[6]
Their discussion is interrupted by a group of enemies blocking their path to the final sand dune, and they defeat them in order to continue.[6]


Charred Wasteland
(2/2)[]
The Sphinx-mobile buggy crests the final sand dune at full throttle - and lands in a wartorn, barren wasteland, dotted with flames and inhospitable for humans. Da Vinci surmises it is due to the King of Mages' influence, despite Singularities being normally and paradoxically insulated from the Incineration of Humanity. In cases where the Foundation of Humanity is greatly disturbed, not even the Singularities are safe, and the land within them will also be incinerated in time. [6]
She presumes this is why King Ozymandias chooses not to use the Holy Grail, as the land will fall to ruin even without its influence. The team is set upon by a group of corrupted humans, partially turned into ghouls living only through hate and envy by the influence of the era's deterioration. They non-lethally dispatch the soulless humans, most of whom flee from the pain or are subdued by force.[6]
Ritsuka, feeling pity, offers to leave them some supplies. Da Vinci is against the decision, but Mash outvotes her, and she relents. After giving the supplies over, one of the more lucid soulless humans gives the team advice in return. They reveal that the Lion King housed in the Holy City to the east eradicated the Crusaders originally trying to burn the world down. Despite the City's apparent outward beauty, the soulless man warns them of the ugliness within, and to not approach the city if they wish to live.[6]
As the sun sets, Dr. Roman manages to reconnect with the team, two days after the Rayshift, despite being able to see Ritsuka's signal the whole time. Mash recounts their findings to Roman as night falls. Roman immediately assumes the Lion King to be the historical King Richard the Lionheart, only to be informed of the Crusaders' eradication. Roman is shocked, as the map of the Singularity shows a large city - if the Crusaders haven't occupied it after taking the Holy Land, then who is?[6]
However, before they can continue their discussion, Roman detects a powerful Servant signature near them, and traces of life. The team immediately stop the buggy and hide. They watch as an Assassin Servant, Hassan of the Intoxicating Smoke, leading a band of 40 Holy Land refugees, is pursued and cornered by a lone red-haired Archer Servant wielding a bow.[6]
Da Vinci stops Ritsuka and Mash from assisting the Assassin, recognising the Archer is empowered by a "Gift", and would likely kill them. Intoxicating Smoke appeals to the Archer's chivalry, and attempts to strike a deal to let the civilians go in exchange for her life. The Archer refuses, having been sent to capture them all, but Intoxicating Smoke offers a compromise to not move his legs and right arm for a day instead.[6]
Before the Archer can react and object, Intoxicating Smoke enacts her side of the bargain, severing her own head as she implores the civlians to run and seek refuge from Cursed Arm in the east. [6]
The Archer fulfils his side of the bargain - only to violently butcher the civilians anyway with his bow, Failnaught, firing blades of sound simply by plucking its bewitched string. The Archer callously admonishes Intoxicated Smoke's recklessness, stating that she should've told him to not move his fingers instead. The horrified Ritsuka and Mash are unable to do anything but watch and endure the slaughter, as Da Vinci informs them that the Archer is more powerful than any Servant they have come across before. [6]
The Archer leaves with no civilian survivors remaining. The heroes emerge to find Intoxicated Smoke reanimated, her grudge returning as a vengeful Shadow Servant due to her affinity with the land. To prevent it from growing into a violent monster, they defeat it to put the Assassin's soul to rest. Intoxicated Smoke thanks Mash for defeating her, and requests for the heroes to bury her brethren before disappearing, to which they oblige. [6]
The following day, the heroes save and escort another group of refugees from soulless bandits and monsters. They learn that the refugees are headed for the Holy City, believing it to be the only safe haven in the land after the Lion King and his Knights defeated the invading Crusaders. The refugee woman leading them informs the heroes of the Ritual of Holy Selection, a monthly ceremony where the Holy City's gates are opened to accept refugees, and none are rejected. [6]
The refugee group consists of half of a village that was burned down, the other half seeking refuge in a mountain village instead, distrustful of the Holy City's Knights. After the team collect their information, the refugee group go on ahead. [6]
The team consolidate their findings thus far - there appear to be three factions in conflict within the Singularity: the Lion King, who rules the land from the Holy City; The Sun King Ozymandias, who independently rules the Egyptian territory as a separate nation; and a faction of skull-masked Assassins, associated with the Old Man of the Mountain. [6]
Da Vinci surmises that the Sun King and Lion King have formed a non-aggression pact, with the Assassins in the mountains acting as a resistance to both kingdoms. With little information to go off, they resolve to continue for the Holy City as their next lead to ascertain its true nature.[6]
The Wailing Wall[]
The team arrive at the Holy City in the night - finding a grand city surrounded by pristine white walls, a massive citadel at its heart. Around its main gate, a thousand refugees have gathered outside in camps awaiting the Ritual of Holy Selection. [7]
As the team are setting up, they are accosted by a gang of scammers preying on refugees, led by a Muslim merchant, Saruhan. The heroes easily subdue them, and Saruhan surrenders. He informs them that the other local merchants formerly did business with the Crusaders, but the Lion King's arrival resulted in the merchants' purging (him only surviving by quickly surrendering). Before the heroes can learn more, however, he escapes with his gang, but warns them to turn back from the City as a final piece of advice.[7]
With no other choice, the team decide to join the refugees in disguise anyway, seeing the ceremony as a way to get inside the City and gain the audience with the Lion King. Slipping into the edge of the refugee group, they notice knights from the Holy City with highly concentrated magical energy signatures surrounding the refugees.[7]
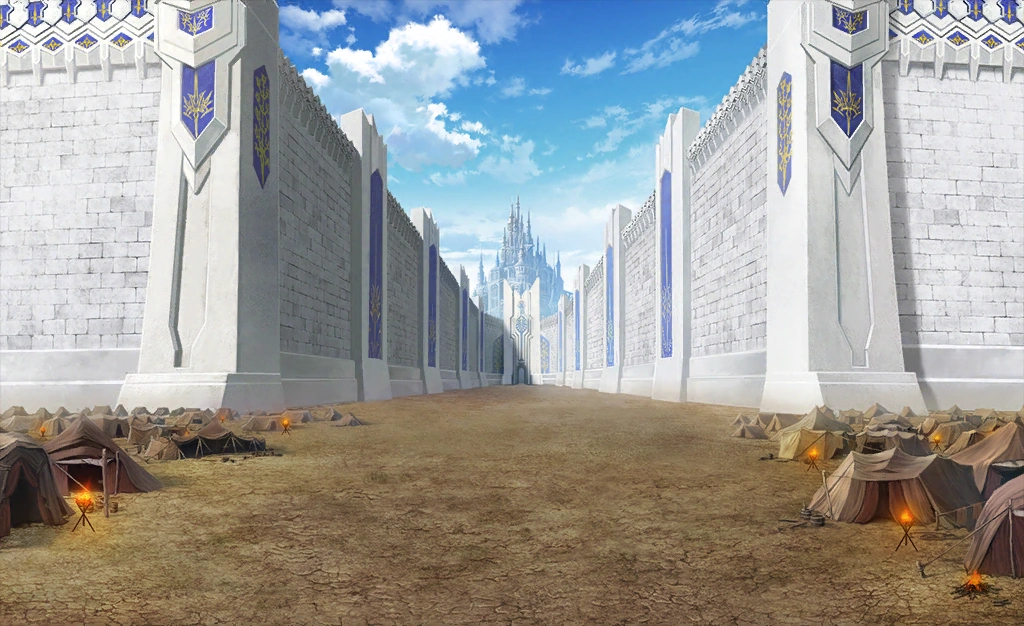
Refugees camped outside the Holy City of Camelot
Suddenly, the night changes without warning into bright daylight. A Servant emerges from the Holy City - Sir Gawain, Knight of the Sun, and Knight of the Round Table. He reveals the phenomenon is a Gift bestowed upon him by the Lion King: for the sun to always bless him. Suddenly realising the truth of the ceremony, a horrified Da Vinci informs Ritsuka and Mash that they need to escape. [7]
The Holy City is revealed as none other than Camelot, held by the Knights of the Round Table. The Lion King themselves appears atop the gates of Camelot, beginning the Ritual of Holy Selection. The King announces that only the purest souls can be admitted into the City as the roots of humanity rot and fall. A light manifests around three refugees - the souls selected by the Lion King, including the mother of a young boy (but not the boy himself).[7]
With the Holy Selection complete, the Lion King commands Gawain to collect the three chosen refugees... and the Holy Punishment begins, the surrounding Enforcement Knights slaughtering the unchosen refugees en masse. [7]
The heroes waste no time in engaging the surrounding Enforcement Knights, creating an opening in the line for refugees to escape. They are surprised to find defeated Knights vanishing, and Roman's analysis reveals them to be beings close to Heroic Spirits forged using powerful spells beyond that of a human being.[7]
Enforcement Knight reinforcements arrive, reporting their obstruction to Sir Agravain. As they engage the reinforcements, Roman detects another disturbance elsewhere in the chaos - another party is fighting the Knights to the east, with the Chaldea team taking the west.[7]
An Enforcement Knight attempts to escort the Selected refugee mother into the Holy City, who is unwilling to leave behind her son Rushd, who was not chosen. Unwilling to compromise, the Enforcement Knight attempts to execute an unaware Rushd, but his mother shields him, taking the fatal blow instead.[7]
The Knight attempts to kill Rushd again, condemning him and his mother as mountain scum, but an enraged Mash arrives and eliminates the Knight - too late to save Rushd's mother. Before the team can take Rushd and escape to the west, however, they are confronted by Sir Gawain, who resolves to judge them himself.[7]
Roman reveals that the Lion King is, in fact, King Arthur. However, they are distinct from the incarnations encountered in Singularity F and London - with power far surpassing that of even a Servant. Gawain deduces the heroes to be the awaited defenders of humanity, and engages them in battle.[7]
Blessed with the Numeral of the Saint, Gawain is empowered to nigh-invincibility by the permanent daylight caused by his Gift. Even without using his Noble Phantasm, the team is outmatched completely. Ritsuka confronts Gawain, demanding to know their motives for slaughter. Gawain proclaims that the Lion King seeks to create a utopia filled with only the most exceptionally good of humanity, with the rest to be purged. Completely loyal to his King, Gawain has no qualms in acting in accordance with their justice.[7]
Mash engages Gawain once again, but is immediately rebuffed. Gawain criticizes Mash for not showing any hostility towards him, despite defeating the earlier Enforcement Knight out of hatred. He condemns her as being unable to carry the burden of her shield, and prepares to strike the final blow.[7]
Gawain is unexpectedly stopped by Lucius, who defends Mash and counters Gawain's criticisms as hypocrisy. Lucius forces back an astonished Gawain with Switch On - Airgetlám, and Gawain reveals "Lucius" as Sir Bedivere, fellow Knight of the Round Table. [7]
With Bedivere's help, the heroes manage to push back Gawain, Airgetlám able to brush aside Gawain's Galatine. However, Bedivere suddenly falters in pain, the power of Airgetlám literally burning him from the inside. With Da Vinci having defeated the enemies behind them and using a flashbang, the heroes escape through the opening with Bedivere and Rushd. [7]
Gawain, unable to pursue, is still in shock at Bedivere's appearance, wondering why he has suddenly appeared now.[7]
Taking Flight[]
(1/2)[]
The heroes make their escape, breaking through the knights' formation. With Gawain no longer pursuing, the sky has returned to night. Roughly 50 surviving refugees have escaped with them, with about 100 escaping from the break in the east. Bedivere asserts that there is no way to assist the eastern group without being recaptured, and the team determine to cover the escape of the western refugees only. With Da Vinci leading the refugees, Mash, Ritsuka and Bedivere cover the rear against the Enforcement Knights.[8]
Gawain reports into Camelot's throne room, where he is informed by Agravain that the Lion King is already aware of his failure, and his punishment will be decided later. Tristan, seeing his failure as disrespectful to the King, offers to kill Gawain himself (his Gift being useless in the throne room). Mordred is shocked, and Agravain stops Tristan, asking after the rebels' nature.[8]
Gawain passes off the rebels as two unknown Servants likely summoned by the Grail, deliberately omitting Bedivere's involvement. Before they can continue, however, the Lion King herself enters, awakened from her nap. Gawain gives his report of the disturbance to her at her request. He further reveals that the second escaped refugee group was sheltered by suspicious merchants, heading for an unknown destination. Agravain's attention is piqued, noting that one merchant leader's death is unconfirmed.[8]
The Lion King delivers Gawain's punishment - blasting him with a small but fatal amount of power from her sacred Lance. Gawain is blown through the castle wall, and sent flying out to the Holy City's outer wall. Despite this, he manages to barely survive, immediately earning the Lion King's pardon. [8]
The Lion King commands Mordred to leave the Holy City, her only being allowed to stay within the City during the day. Agravain expresses confusion at Mordred's half-exile, to which the Lion King passes off Mordred as only being useful for patrolling the lands outside. Before leaving, she orders Agravain to ignore the escaping refugees to die in the wastelands, prioritising their eventual attack on the Sun King (including keeping Mordred alive) upon Lancelot's triumphant return. [8]
Agravain deduces that the rebels are led by the foreign Master they are seeking, and orders pursuers sent to destroy them anyway. Annoyed at the Lion King's dependence on Lancelot, he orders that Lancelot be reassigned to pursue the rebels as well, under the condition that he may not return to the Holy City until they are dead.[8]
The heroes escape with the refugees into the wastelands to the west. Confiding with the refugees, Bedivere offers on the heroes' behalf to continue protecting them in exchange for guidance into the mountainous region to the north - the domain of the Old Men of the Mountain, the third faction.[8]
Roman introduces himself to Bedivere. He deduces that Bedivere was attempting to enter the Holy City himself in disguise, but stopped to assist Ritsuka's group in breaking the line of knights. Bedivere confirms this, his aim being to seek an audience with the Lion King, his former liege, and question their violent acts. [8]
Roman surmises that the Crusaders were set to be the original foe of the Singularity, taking over the Holy Land in a never-ending war, transformed into a Demon God. Instead, they fell at the hands of King Arthur long before Chaldea's arrival. Arthur, assuming the title of Lion King, built their own Holy City of Camelot with the Knights of the Round Table instead, further distorting the Singularity instead of repairing it.[8]
Bedivere confirms that he was sent to assist Chaldea, and Romani in particular, by Merlin himself, the fabled court mage of King Arthur, currently shut away in Avalon. Ritsuka and Mash formally resolve to face the Lion King and the corrupted Round Table alongside Bedivere. They set out north for the mountains with the refugees, aiming to reach the villages in two days.[8]
The following day, Da Vinci amuses the now-awakened Rushd, whom they have informed that his mother had joined another refugee group to explain her absence. Bedivere confirms that his Airgetlám is a replica; an artificial Noble Phantasm given to him by Merlin. While he can only use it in short bursts, with it he is able to stand against the Round Table.[8]
Da Vinci explains her findings on the Knights of the Round Table's Gifts - they are blessings from the Holy Grail itself given to the Knights under the Lion King; not from Solomon's Grail, but the true Holy Grail from Arthurian legend. Raised beyond the level of ordinary Servants, only Bedivere is able to stand against them for a short time.[8]
Fighting past raiding monsters, the party soon approaches the mountains, where they can make their way to the hidden eastern village, safe from the knights' pursuit. Unfortunately, a pursuing force of Enforcement Knights rapidly closes in from behind - led by a reluctant Sir Lancelot on Agravain's orders. [8]
The heroes defeat the vanguard, but the main force threatens to surround the panicking refugees entirely. With no way out, Da Vinci volunteers herself before they or Bedivere can protest, aiming to use her new ornithopter, Sphinx Megiddo, as a suicide bomb. Using her staff and magical circuits as its explosive charge, the ornithopter has no autopilot installed, requiring Da Vinci to manually pilot it into the enemy and to self-destruct. [8]
Da Vinci, having predicted this outcome from the beginning, bids a reluctant Roman and the heroes farewell, assuring them that they will meet again if she survives. She drives headfirst into the pursuit force and self-destructs, seemingly perishing to delay Lancelot while the rest of the group escapes. With the pursuers' horses being lost in the chaos, Lancelot calls off the search until he can replenish his cavalry. Sending word to a western fort, he prepares to comb the mountains in search for the village.[8]
(2/2)[]
The grief-stricken party traverse the crater-marked mountains, a day out from the village. With Da Vinci no longer around to manage supplies, the refugees find themselves in danger of running out of food. Unexpectedly, using experience from his travels, Bedivere provides a solution in the form of monster meat, which they harvest from nearby wild beasts.[8]
After a difficult but filling meal, Mash notes the enormous craters dotting the mountain landscape. Rushd reveals the cause to be the Lion King's Judgment - the destructive aftermath of the Lion King's Noble Phantasm, a power akin to Solomon's band of light used to terrorise the common people. Disgusted, Bedivere condemns the Lion King as a demon king worse than Vortigern.[8]
Adventure in the East Village[]
As the sun falls, the party draw nearer to the eastern village. Rushd reveals that his mother once brought him there, telling him to go there if he was ever in trouble. Even with the Holy Land being robbed from them, the native Saracens still built the mountain villages to pray as close to the Holy Land as they could.[9]
They are confronted by a skull-masked Assassin, his right arm bound, who guards the eastern village. Suspicious, he aggressively shuns the refugees, recognising Bedivere as a Knight of the Round Table. While he agrees to shelter the refugees, he bars Ritsuka's group from entering, despite having learnt from his scouts of their heroism saving the refugees. Unwilling to let them leave lest they reveal the village to the Holy City, he fights them, and they defeat him non-lethally.[9]
A fellow Servant guarding the village, the Persian Archer, Arash Kamangir, arrives and pacifies the Assassin, Hassan of the Cursed Arm, an Old Man of the Mountain. Vouching for the heroes, Arash reveals that Cursed Arm was in fact overjoyed to learn of the refugees' salvation, and convinces the mollified Cursed Arm to accept them.[9]
Additionally, Cursed Arm recognises Rushd, who also vouches for the heroes, but is saddened to learn of his mother, Salia's absence, deducing her fate. He informs the heroes that Salia originally came from his village before leaving to marry in the Holy Land - a tale from his own past, revealing he was summoned into the era he originally lived in. [9]
Cursed Arm officially accepts the heroes into the eastern village, which while impoverished, is still concealed in the mountains without use of Magecraft. Arash allows them to use the village's leyline to make a summoning circle after they explain their mission to him (Da Vinci's absence being strongly felt). Bedivere expresses his desire to continue alone, but is convinced to rest by Arash, Roman noting his erratic Spirit Origin. With Arash acting as their guide, Ritsuka and Mash join the daily life of the village while Bedivere rests, including protecting the village from bandits with Arash. [9]
A week passes with no sign of the Round Table's pursuit. Bedivere talks privately with Mash and Ritsuka in the night. He asks after Mash's True Name as a Heroic Spirit, but she admits she does not know it, let alone the True Name of her Noble Phantasm. Bedivere is satisfied regardless, swearing utmost respect for Ritsuka and Mash's cause. [9]
He reveals that he (and the other Knights) know the Heroic Spirit within Mash. They are in fact a fellow Knight of the Round Table, described as the strongest, wisest and most courageous of them all, the reason behind Mash's sudden reluctance in the battle at the Holy City. Bedivere declines to reveal Mash's True Name, however, leaving it to Mash to discover for herself.[9]
Even with this knowledge, Mash and Ritsuka swear to fight the Lion King by Bedivere's side. Bedivere announces his intent to ask Cursed Arm's help in his quest to defeat the Round Table, unaware that Cursed Arm is already eavesdropping.[9]
The following day, Bedivere makes his formal request to Cursed Arm. Cursed Arm reveals that the mountain people are already planning to resist - each village has their own Old Man of the Mountain, each gathering their forces to stage a counterattack against the Lion King. Despite needing more fighting power, he admits he cannot easily accept the help from two Knights of the Round Table (accidentally revealing he was eavesdropping). He challenges the heroes to prove themselves against himself and Arash (forbidding the latter from using his Noble Phantasm), willing to accept them if they can best the pair.[9]
Indeed, the heroes prevail, and Cursed Arm formally requests their help against the Lion King, to which they accept. With their alliance now official, Cursed Arm explains the long lineage of his name of Hassan-i Sabbah, and the title of Old Man of the Mountain. With the current situation, the other Old Men of the Mountain have been summoned, acting as leaders for each of the mountain villages.[9]
Cursed Arm offers to take the heroes to their headquarters, where his fellow Hassans will be gathering in a few days. He reveals their losses - Hassan of the Trembling Pipe lost to Lancelot, while Hassan of the Peeling Shadows lost to Gawain. However, he is unaware of Intoxicating Smoke's death at Tristan's hands, and the heroes inform him of their loss.[9]
Before they can continue, however, an emergency strikes: a watchman informs Cursed Arm that the western village has been discovered and is under attack - by Sir Mordred.[9]
Mordred, the Raider Knight[]
Mordred is revealed as a Raider Knight, a Knight of the Round Table exiled from the Holy City and given territory in an outside fort, free to roam the land and crush their enemies. With Mordred's force closing in, the west village under Hundred Personas's protection can last half a day. However, the east village is a full two-day walk away, and Arash suggests a risky, one-way solution to reach the village quickly.[10]
Joined by Ritsuka, Mash and Bedivere, Arash's "solution" involves tying a rope between an arrow and a large discarded roof slab. With the heroes clinging to the roof slab, Arash fires the arrow towards the western village. The strength of a Servant caring nothing for the laws of physics, the arrow pulls Arash and the entire roof slab, hapless heroes and all, sailing into the air at 300 kilometres an hour.[10]
The heroes soar over the entire 20 kilometre distance between the villages, and crash-land near the west village. With Cursed Arm (who was apparently with them hidden the whole time) acting as their guide, they fight their way past monsters to the west village, where Hundred Personas is fighting a losing battle against Mordred.[10]
Mordred reveals she simply found the west village by pure Instinct, but intended to find the escaped refugees first as an insult to Lancelot. She lets slip that the Lion King's Holy Selection will be complete in a few days, after which the land outside the Holy City will be destroyed entirely. With Mordred having no home inside the Holy City, she too will be destroyed, a fact that she is unnervingly content with.[10]
Mordred cuts down Hundred Personas after she refuses to reveal the east village's location, but is soon informed of a surprise attack. The heroes have engaged Mordred's rear guard, with Arash covering them from behind, and it isn't long before Mordred herself confronts them. It is revealed to a dismayed Mash that Mordred has no memory of the events of the London Singularity (but still recognising the Heroic Spirit within Mash), and a far more brash and murderous temperament.[10]
She is shocked to find Bedivere among them, and angered, she dons her armour and engages the heroes in battle. Armed with her Gift, Rampage, she is able to constantly release her sacred sword's power, as much as she desires until her soul burns out. Taking her insults that he is inferior to the other Knights, Bedivere emboldens his resolve and holds back Mordred using Switch On - Airgetlám. [10]
Removing her helm, Secret of Pedigree, the enraged Mordred engages the heroes again, this time using her Gift to constantly unleash her Noble Phantasm, Clarent Blood Arthur. However, she finds herself pushed back once again. It is revealed that her armour and Secret of Pedigree, due to being made to rebel against King Arthur, is rejecting the Lion King's Gift, meaning Mordred is still holding back out of pride. [10]
Seeing no other choice to avoid losing, Mordred prepares to obliterate the entire mountain. But before she can unleash Clarent's full power, Arash arrives and fires arrows into her arm joints, immobilizing her. Having defeated the rest of Mordred's unit, Arash belittles Mordred, deducing that the self-destructive nature of her Gift was intended by the Lion King to dispose of the Knight. [10]
Mordred accepts her fate, wishing to die at her father's hand, but Arash rebukes her for attempting to drag others down with her with no pride as a warrior. At a stalemate, and with Arash at full strength, Mordred accepts her defeat and is convinced to pull back. She swears an oath to face the heroes and Arash again at the Holy City before leaving. [10]
Before the heroes can savour their narrow escape, however, Bedivere suddenly collapses.[10]
Sanzang Returning from the West[]
(1/2)[]
The unconscious Bedivere reminisces on a memory in life with his liege, King Arthur, the King of Knights. Despite his long travels, he still remembers it fondly. Atop a castle battlement, a grim and hardened Arthur discusses the coming winter with Bedivere, and the harsh sacrifices made for the sake of Camelot's prosperity.[11]
Bedivere timidly questions why he was made a Knight of the Round Table, believing himself to be inferior to the others. Arthur confides in him that she feels the same about herself. She explains that in an era where the lines of good and evil are blurred, distinct from the lines between friend and foe, the Round Table needs compassionate Knights like Bedivere who can still care for the common people.[11]
Bedivere, unable to reply, goes on a tangent, expressing simple joy at a citizen's recent successful birth. Breaking her grim demeanour, Arthur gives a rare smile at Bedivere's kindness, heartened to see the happiness of others.[11]
As the memory concludes, the still-unconscious Bedivere admits that despite his, he has committed a terrible sin against his King, and begs her to forgive him - a cry heard even by Arash, who leaves him to sleep as night falls. Mash surmises based on her own feelings that he is feeling guilt at rebelling against his former liege, considering it as treason. [11]
They recount the end of the historical Bedivere's story, being by the dying King Arthur's side after the Battle of Camlann. Bedivere was tasked with returning her sword, Excalibur, to the Lady of the Lake, which would result in the King's final death. Believing the sword could still heal the King, Bedivere failed twice to return the sword, and lied upon his return - his only acts of disloyalty.[11]
Despite this, Arthur could not be deceived, and Bedivere returned the sword on the third and final journey, and the King finally passed at dawn.[11]
Cursed Arm thanks the heroes for their assistance, and takes them to meet the village leader, Hundred Personas. A grateful thanks immediately turns into angry shock as Hundred Personas recognises the heroes from their accidental encounter in the Egyptian desert. Enraged, she stubbornly refuses to fight alongside the heroes.[11]
An amused Cursed Arm reveals that another, younger Old Man of the Mountain has been captured, being held in a fort controlled by the Round Table. Unable to kill herself due to her constitution, she threatens to leak information under torture. Under Cursed Arm's gentle prodding, Hundred Personas is reluctantly convinced to accept Ritsuka's help in rescuing the captured Hassan. She gives the sole condition that a hostage be kept to ensure the heroes' cooperation, and they immediately volunteer the unconscious Bedivere. [11]
Reluctantly satisfied, Hundred Personas leads the heroes and Cursed Arm on a day-long journey to the fort. With Arash staying behind to watch the west village, they fight past a group of bandits to get on their way.[11]
(2/2)[]
As day breaks, the heroes make their way through the wastelands under cover of a sandstorm, safe from the Holy City's forces. Dr. Roman detects a Servant signature ahead, distinct from the Knights of the Round Table. Hearing the sound of a woman screaming in distress, they rush to assist, to Hundred Personas's annoyance (Ritsuka finding the voice familiar).[11]
Fighting past Holy City soldiers and monsters, they encounter the Servant - a ditzy Buddhist monk. It is revealed she had accidentally summoned a great Dragon (implied to be from the France Singularity) while attempting to summon the White Dragon Horse, which attacked her instead.[11]
After vanquishing the Dragon, the Servant formally introduces herself as Caster Xuanzang Sanzang, travelling monk and protagonist of the Journey to the West. Having been summoned into the era half a year prior, she previously lived in the Holy City for two months as an honoured guest, before leaving to pursue other ventures.[11]
She reveals that she had acquired her own disciple - another Servant named Touta, who was captured and taken prisoner in a Holy City-controlled fortress, the same as the captured Hassan. Having gotten lost in her attempts to rescue him, she joins the party in their mission to infiltrate the fort, taking Ritsuka as her new disciple.[11]
Flower of Poison, Blade of Iron[]
The party reach the guarded fortress under cover of night, Roman detecting two Servants in an underground space beneath the fort, surmising it to be a dungeon. Eavesdropping on passing soldiers, they learn that Lancelot had visited and requisitioned horses from the fort previously, and that a suspicious bowman was captured there by Enforcement Knights. [12]
In addition, they learn that a Knight of the Round Table, Sir Agravain, is secretly visiting the fort, despite not being allowed to leave the Holy City. A master interrogator, the soldiers suspect that he is coming to interrogate the Old Man of the Mountain kept within, who has thus far resisted torture.[12]
Cursed Arm, sensing a mounted group approaching the fort, suggests that the party split into two: one group acting as a diversion for Agravain's forces and the other infiltrating the fort to rescue the prisoners. Hundred Personas volunteers to distract Agravain using her Zabaniya: Delusional Illusion to make an army of personas, while the others stealthily enter the fort.[12]
Under Cursed Arm's guidance, the heroes easily make their way to the fort's dungeon, fighting off ghosts with Sanzang's help within the old underground ruins. As they make their way deeper into the labyrinth, Mash and Roman inform Ritsuka of Agravain's history as the son of Morgan, King Arthur's enemy and sister. [12]
A cold man, Agravain served as Arthur's adjutant in charge of Camelot's government, but was hated by the other Knights as a possible spy for Morgan. In the end, Agravain was murdered by a crazed Lancelot after he exposed Lancelot's affair with Arthur's wife Guinevere. It was this that began the collapse of the Round Table and Camelot, inadvertently fulfilling Morgan's plans.[12]
The heroes eventually find a hidden passageway guarded by a Spriggan, where Sanzang's disciple Touta, an Archer carrying a large straw bag, sis being kept. After they defeat his guard, Touta (after simply leaving his jail cell with no issue) formally introduces himself as Tawara Touta, a Dragon Slayer samurai from the Heian era. He reveals that he was captured by surrendering to Lancelot after Sanzang foolishly wandered to the fort picking a fight with the Knights.[12]
Touta informs them of the other prisoner kept in the dungeon, and they set off, Roman noting that Touta's Noble Phantasm may in fact be their salvation upon their return to the villages. They hurry to the other cell, noting that Agravain has already arrived and engaged Hundred Personas. Inside, they find the other Old Man of the Mountain - a young skull-masked girl, Hassan of the Serenity. Barely conscious, she is chained to the wall by Agravain's Noble Phantasm, Iron Punishment, from which not even a Servant can escape.[12]
With Servants unable to break Agravain's chains, Ritsuka frees Serenity themselves, only for her to fall on Ritsuka, unmasking herself and accidentally kissing Ritsuka. A horrified Serenity believes that she has just killed Ritsuka. Based on the Indian legends of the Visha Kanya, her entire body is cultivated to be poisonous; her Zabaniya technique takes this to its extreme, making even a touch fatal.[12]
Ritsuka turns out to be alive and well, being entirely immune to her poison thanks to Mash's passive protection, a fact that both surprises Serenity and earns Ritsuka her adoration. Before they can escape, however, they are greeted by Agravain himself. [12]
Agravain sends his Enforcement Knights to apprehend the heroes, but they are swiftly defeated. He offers Sanzang a final chance to return to the Holy City and join the Round Table in Gareth's empty seat. Sanzang is tempted, having seen the perfect utopia within the Holy City for herself. She admits that she thinks the Lion King is not wrong, and has been uncertain which side to take in the conflict.[12]
However, she finally determines that the Round Table's tactics are wrong, and refuses Agravain's offer, questioning his and the Lion King's true nature. She further reveals that she had previously journeyed across the Egyptian desert. Upon discovering an "end" to the world on the other side of the desert, she was motivated to return, resolving to learn the truth behind the Singularity and the Lion King.[12]
Agravain rescinds his offer and attacks the party with a special unit of Enforcement Knights. Strengthened by Agravain with Madness Enhancement modelled after Lancelot's berserk self, the heroes are barely able to fend off the Knights. It is revealed that Agravain has no Gift - he had deliberately refused one to avoid being fully contracted to the Lion King, granting him autonomy.[12]
Sensing danger, Agravain suddenly retreats, leaving his Knights behind - who collapse immediately afterwards. Serenity reveals that she defeated them using her poison, releasing it into the air with her movements and allowing it to propagate in the confined dungeon as the heroes fought. Ritsuka carrying an infatuated Serenity, the heroes make their escape.[12]
Feast, West Village[]
(1/2)[]
Outside the fort, the heroes join an irate Hundred Personas, who had been fending off Agravain's forces for over an hour. She informs them that Agravain fled for the Holy City on horseback. The party and Serenity deal with stragglers as the exhausted Hundred Personas steals them horses, after which they return to the west village.[13]
(2/2)[]
The heroes return victorious to the west village, where Arash and a rejuvenated Bedivere await them. Touta wastes no time in revealing his Inexhaustible Straw Bag, an Anti-Feast Noble Phantasm able to release infinite amounts of rice and food. With the village's food shortages instantly solved, they celebrate into the night with a feast.[13]
Cursed Arm looks fondly with Ritsuka and Mash as the other Servants drunkenly enjoy themselves. He tells them his story as an ordinary man who foolishly abandoned his life and love to become an Old Man of the Mountain. With no exceptional talent of his own, he sacrificed his own body to replace his right arm with that of the demon Shaytan. [13]
Thus, he formed his own identity as Cursed Arm, with a Zabaniya that allows him to qualify as an Old Man of the Mountain. Despite this, he failed to realize that in doing so he would ironically lose his identity, conflated with the other Old Men as a single concept, indistinguishable in history. As the only sober heroes, they fight off groups of monsters straying near the village before Cursed Arm takes his leave for the night as the feast ends.[13]
Alone in the night, Mash privately talks with Ritsuka, discussing the transient nature of the Singularities. They come to the conclusion that the events they experience within the Singularities will still have meaning, even if they are completely erased by their correction.[13]
Meanwhile, Sir Tristan arrives at the recently-raided fort, investigating the previous ambush. Upon hearing of the casualties suffered from Serenity's poison, Tristan coldly executes several surviving soldiers for their incompetence. The rest are ordered to raise a search party, Tristan taking it upon himself to track the escapees down, using his bow's acoustic powers to follow their trail.[13]
The following day at the west village, Hundred Personas, joined by Serenity, formally challenges Ritsuka, Mash and Bedivere once again to a final duel to fully earn her trust. After the two Assassins are bested, the Servants begin their discussion of their next move - the endgame being a full-scale attack on the Holy City with the gathered mountain people, currently 7000 strong.[13]
They come to the conclusion that even with closely matched numbers, and a numerical advantage in Servants, the mountain people are still inferior to the Round Table army. With Gawain being functionally invincible due to his Gift of Nightless, an attack is bound for failure without a Servant on the calibre of Lancelot to counter Gawain. In addition, Ozymandias's army still remains as an enemy, as the holder of the Grail.[13]
With little other options, Serenity meekly suggests using their ultimate secret against Gawain - the reason behind her capture and interrogation. It is revealed that the Hassans are hiding a trump card - the Shrine of Azrael, within which lies the dormant founder of the Assassins' sect, the First Hassan-i Sabbah. It is further revealed that Bedivere is aware of the First Hassan's existence, having been informed by Merlin to seek his assistance to face the Lion King.[13]
Cursed Arm, while knowing the dire consequences of seeking the First Hassan's help, accepts their new plan to defeat Gawain regardless.[13]
The Evening Bell of Death[]
(1/2)[]
The team split up - Hundred Personas heading to the wastelands to recruit other villages, and Cursed Arm leading the others back to the east village. They reach the east village two days later (refusing another flight from Arash), finding an overjoyed Rushd. Touta dispenses his recharged Straw Bag to provide food for the east village, while Cursed Arm and Serenity inform the team of their next objective.[14]
With no time to waste, they are to immediately head deeper into the mountains on a two-day trip to reach the Shrine of Azrael, where the first Old Man of the Mountain awaits. They note that he is powerful enough to rival even the Lion King, but refrains from active conflict due to his philosophy of letting opponents fall to their own fate. Bedivere continues to display surprising knowledge regarding the Old Man, which he claims came from a Mage in France.[14]
The team set out for the Shrine, Arash once again remains behind to protect the east village as a lookout. Before they leave, he gives parting advice to Bedivere, aware of a secret he is keeping. Along the way, they encounter groups of maddened hostile creatures and people, Cursed Arm realising something is wrong. He notes that such enemies would never venture near the Shrine for fear of the bell, and guesses that they fled from the Lion King's wastelands.[14]
After making camp for the night, Mash finds Sanzang alone, keeping a memoir of her adventures. They talk in private, Sanzang being impressed by Chaldea's Servant summoning capabilities. Mash asks Sanzang her motivations for persistently continuing her journey in life. Sanzang replies that her actions cannot be explained by reason - she simply follows the voice of the Buddha, and does whatever she genuinely believes is the right thing to do. Sanzang is quick to note that Mash is similar, and Mash recalls Francis Drake's words to her stating much the same.[14]
Mash asks whether Sanzang considers the Lion King an enemy. Sanzang reiterates that she doesn't dislike the Lion King, and has no interest in fighting against either her or King Ozymandias. She notes that both rulers (though she was prevented from meeting the latter personally by Nitocris) had much the same motivation of wishing to protect their people, with their nations both being similarly peaceful.[14]
However, Sanzang assures Mash that she is committed to the heroes' side, having gained a new dream of going to Chaldea, becoming Ritsuka's mentor and triumphing over the King of Mages.[14]
(2/2)[]
The party reach the Shrine of Azrael, where its sole angered inhabitant has placed ghosts to guard the entrance. Fighting their way inside, they are suddenly overwhelmed by the great presence of the First Hassan, who remains concealed. [14]
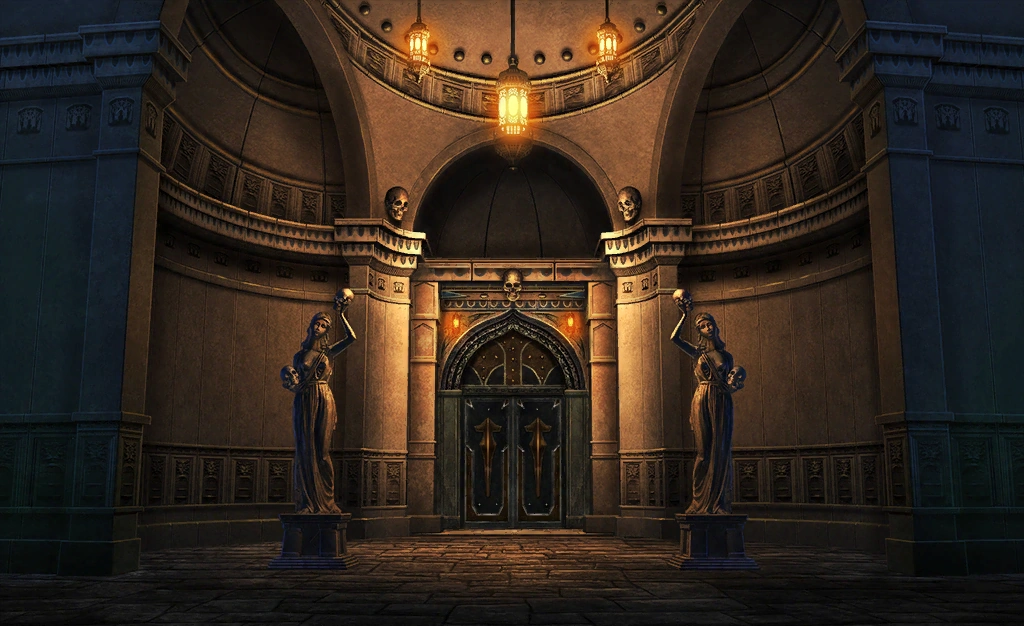

Shrine of Azrael
The heroes are confronted by the invisible founder (whose sudden illusory "attack" literally leaves Ritsuka "dead" on Chaldea's instruments), who challenges them to a test of combat to prove themselves. Serenity is forcibly possessed and strengthened to act as their opponent, despite Cursed Arm's protests.[14]
Against all odds, they manage to defeat Serenity without killing her, and the founder reveals himself - an imposing skull-helmed swordsman, the First Hassan-i Sabbah. Cutting off Roman's feed before he can reveal his nature, the First Hassan agrees to the heroes' pleas to combat Gawain, but personally gives Ritsuka a condition to fulfill. He tasks Ritsuka with finding a place known as the Atlas Institute within the Egyptian desert - where they will be able to learn the full truth behind the Lion King, and the cause of the Incineration of Humanity.[14]
With the deal made, the consequences of seeking the First Hassan's help come to light. It is revealed that the First Hassan governs the lives of his successors - executing them when they become unworthy of the title. By directly seeking the Founder's help, it is in itself an admittance of unworthiness. Despite this, Cursed Arm still led the heroes to the Shrine, knowing he would be executed for doing so.[14]
The First Hassan allows Cursed Arm to fulfil his duty to stop the Lion King, after which he will be executed. He bids the heroes to make haste for the Atlas Institute, restore the Holy Land, and to return the "holy artifact" before the Lion King's lance can return to its "true form".[14]
Village in Flames[]
The heroes begin their return to the east village, Roman's connection returning and Serenity profusely apologizing for her possession. Mash (reluctantly) updates Roman, and it is explained to Ritsuka that the Atlas Institute is one of the three major schools of the Mage's Association, focused on alchemy. Designers of Chaldea's TRISMEGISTUS, their aim is to prevent humanity from befalling a bad future.[15]
The return to the village proves faster, owing to the downhill trail and lack of enemies. As night falls, Mash confides in Ritsuka her suspicion that the First Hassan deliberately cut Roman's feed to hide knowledge of the Atlas Institute from him, making her reluctant to inform him of it.[15]
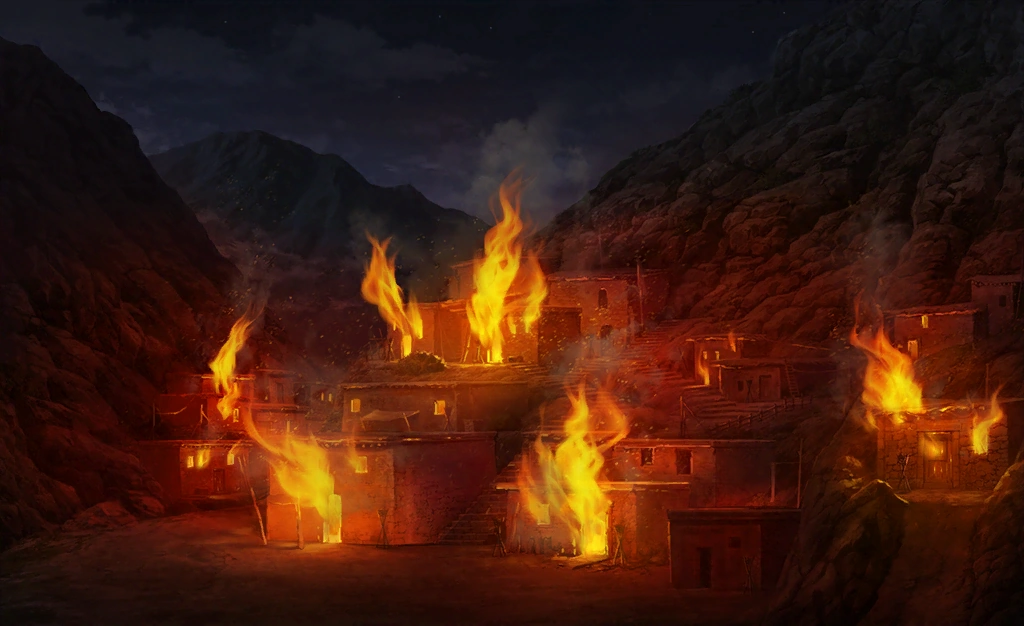

Eastern village under attack.
However, as they approach, Touta sees that the east village is aflame, under attack by Holy City soldiers. Cursed Arm goes on ahead, leaving Serenity to protect Ritsuka, and the other Servants split up to protect the villagers. Guided by Serenity, Ritsuka and an enraged Mash make their way to the village, facing Enforcement Knights slaughtering villagers.[15]
The heroes and Servants reconvene in the burning village with an outraged Cursed Arm, neither Arash or a single survivor to be found. A unit of Enforcement Knights attack, reporting to their Commander that their target Servant has been found. After they defeat the Knights, Serenity deduces from the male-only villager bodies that half of the villagers have been evacuated by Arash, and they head for a nearby cave meant to be used for evacuation.[15]
A flashback reveals the beginning of the attack at dusk, Arash conducting the evacuation of the villagers to the cave, including a reluctant Rushd. Arash and a few fighting villagers face the approaching force below, picking them off from afar. Before they can ponder how they were discovered, Arash finds his arrows are being deflected mid-flight. [15]
He can barely deduce that Sir Tristan is responsible before he is ambushed at close range by Sir Lancelot, who snuck up by concealing his presence. The resulting fight goes poorly, and Arash is struck full-on by Lancelot using Arondight Overload.[15]
In the present, Ritsuka, Mash and Serenity are confronted by Sir Tristan himself, who confirms Arash's apparent death. He attempts to blame Serenity for revealing the village to him, having followed her footsteps using his bow, but is rebuked by Mash and Ritsuka. Sensing Bedivere's presence, Tristan battles the trio to draw him out.[15]
The heroes are barely able to hold off Tristan, greatly enhanced by his Gift, which reverses his Class affinity. Bedivere arrives, forcing back Tristan with Airgetlám, shocked by his old friend's callous and murderous change in personality. Bedivere demands to know why Tristan's motivations behind his wanton slaughter, but Tristan places the responsibility on his King, who does not understand human feelings.[15]
Angered, Bedivere once again uses Airgetlám, but quickly begins to burn himself out. Unable to forgive Tristan's deplorable actions, he resolves to even kill his old friend in order to face the Lion King. The heroes engage Tristan in battle once again, this time with Bedivere at their side.[15]
Though they manage to survive, Bedivere continues to suffer the physical toll of repeatedly using Airgetlám, much to Tristan's mocking pity. Tristan reveals that Lancelot has already descended the mountain, having asked to only face Arash himself. Before he can continue, the other Servants arrive to face Tristan alongside the heroes, Cursed Arm swearing vengeance against him in particular.[15]
In response, Tristan points the heroes to witness a pillar of light falling from the western sky - completely consuming and destroying the west village before they can react. He reveals it to be the Lion King's Judgment, a pillar of purification from the sacred lance, Rhongomyniad, with the east village to follow in five minutes' time.[15]
Disgusted, Bedivere accuses Tristan and the Round Table of having gone mad, if they believe this to be truly King Arthur's doing. Tristan counters that they have already cast away their humanity, such that they judgment is not clouded by sentiment - the Lion King has managed to completely sever their human emotions. With that, he abandons the village as he bids Bedivere farewell, his Knights covering his escape.[15]
As they defeat the last of Tristan's Knights, the light of Rhongomyniad appears in the sky, giving the heroes no time to escape or rescue the villagers. The situation seems hopeless.
However, a heavily injured Arash arrives, after having being sent falling to the bottom of the valley by Lancelot. Arash bids the heroes to shelter in the cave, and take care of the villagers while he handles Rhongomyniad. He gives Bedivere final words of encouragement, having seen his secret and true purpose due to his Clairvoyance. He informs Bedivere that he only has one swing of Airgetlám remaining, and to make sure to use it against his final opponent. [15]
With that, Arash bids the heroes goodbye, and Cursed Arm takes them to the cave, carrying a resistant Ritsuka. Arash is left alone to face Rhongomyniad's light... except for Touta, who watches nearby, acting as Arash's last witness and his backup should he fail. Touta watches with awe and respect as Arash fires his Noble Phantasm, Stella, into the sky, completely repelling Rhongomyniad at the cost of his life.[15]
The following day, the survivors mourn their losses in the burnt-out husk of the village. Cursed Arm informs them that thanks to Mordred's previous raid, the majority of the western villagers had already evacuated, including Hundred Personas. As the funeral for the dead begins, Cursed Arm implores Ritsuka's group to leave immediately for the Atlas Institute - news of the village's survival will soon make them a target once more.[15]
Cursed Arm and Serenity resolve to remain in the mountains to complete the evacuation and prepare for the final advance on the Holy City. Cursed Arm plans to spread word of Ritsuka to all the mountain people, and vows revenge on Sir Tristan. Planning to all meet once more in the east village before departing for the final battle, Ritsuka and Mash set out for the desert with Sanzang, Touta, Fou, and Bedivere.[15]
To the Desert of Atlas[]
(1/3)[]
Lancelot reports into the Holy City throne room, believing he has completed Agravain's orders. The Lion King is satisfied with his work, and Agravain tasks Lancelot with protecting the Holy City in anticipation for the confrontation with Ozymandias. [16]
However, Lancelot directly questions the Lion King's use of the Light of Judgment on the mountain villages, where prior it had only been used for intimidation. Seeing its use as needlessly cruel in addition to Tristan's actions, he demands to know the Lion King's motives in doing so. He concludes with an implied threat, making clear that he suspects Agravain manipulated the Lion King into doing so.[16]
The Lion King confirms that she destroyed the villages of her own volition, seeing any potential rebellion as futile as their plans for the sacred lance have reached their final stages. However, Lancelot is only further emboldened in asserting that her enforcement was unnecessary. [16]
Before he can continue, Tristan arrives and reveals the eastern village's survival. Thanks to Arash's sacrifice blocking the Light of Judgment, the rebel heroes have survived and fled into the desert, where Tristan was forced to give up pursuit due to his bow snapping. Tristan reports his suspicions that they are seeking an alliance with Ozymandias, and blames Arash's survival on Lancelot.[16]
The Lion King tasks Lancelot with pursuing the heroes and finishing the job, despite Agravain's protests that he be confined for his failure. Tristan additionally reports the presence of Bedivere, which is corroborated by Mordred and Gawain (who both kept quiet). Agravain is shocked that this information was kept from him, but both Gawain and Tristan (his Gift of Reversal removing any sentiment from their former friendship) assure him that Bedivere is an inconsequential threat.[16]
Undeterred, Agravain tasks Gawain with guarding the Holy City's main gate. Tristan and Mordred are tasked with guarding the castle town and patrolling the city surroundings respectively. However, Agravain is left speechless when the Lion King reveals that she has no memory or knowledge of Sir Bedivere.[16]
Meanwhile, the heroes make their way across the wastelands, engaging native enemies in their path. Roman reminds them that, as before, his communication will be cut off when they reach the desert, and wishes them good luck on their quest.[16]
(2/3)[]
The party enter the Egyptian desert, once again mired in an endless sandstorm. A flashback recounts a report and map received from Hundred Personas, sent by the mountain people. Her map points the heroes towards a ruin that even Ozymandias is unable to investigate, surrounded by his Divine Beasts. She reports that an odd figure clad in a black cape and turban has been frequently spotted around the ruin, apparently hailing from the western lands.[16]
Mash notes that the figure matches the description of T.E. Lawrence, the Englishman who helped lead Egypt to independence. They rescue Sanzang from a close encounter with monsters and Ozymandias's Sphinxes, Sanzang able to ward off the Sphinxes on her own. Recalling Hundred Personas's report, they let Sanzang lead the way to follow the Sphinxes, but not before she notes sensing an approaching threat from behind.[16]
(3/3)[]
The party manage to find the ruin they seek, which is completely encircled by Sphinxes. Before they can plan an approach, however, their mounted pursuers begin to close in. Bedivere resolves to stand and fight, and they are soon faced by Lancelot and his men, hunting the heroes for the third time. Unexpectedly, Mash finds Lancelot familiar.[16]
Bedivere confronts Lancelot himself, demanding to know his reasons for serving the Lion King, despite the atrocities committed on the mountain villages. Lancelot admits that he disapproves of the Lion King's recent actions to destroy the villages. He voices his belief that the Lion King is wrong, having sworn his true allegiance to the King of Knights, not the Lion King. However, even so, he remains steadfast in his duty to capture the heroes, and he engages the heroes in battle.[16]
The Gift-empowered Lancelot proves more than a match for the heroes, and they are barely able to survive his assault. Mash is determined to win against Lancelot, fuelled by an unknown but fervent drive. Suddenly, a giant illusion of Nitocris appears over the ruins, intimidating and condemning Lancelot's force as intruders. [16]
Nitocris's distraction allows the heroes to escape Lancelot, and they make for the ruins, fighting through the Sphinxes guarding it. Upon reaching the ruins, however, a pitfall trap opens, sending the entire party falling into a deep underground chamber.[16]
There, they are greeted by the odd figure - introducing himself as the world's greatest detective, Sherlock Holmes, he welcomes the heroes to the Atlas Institute.[16]
The Hidden Research[]
Holmes reveals that he was the Servant who assisted Ritsuka and Mash in the Fourth Singularity. Beneath Makiri Zolgen's notice, he organized the data in the Mage's Association for Hans Christian Andersen to find. He explains that he has been summoned to help the heroes solve the great murder case at hand: the Incineration of Humanity.[17]
However, Holmes is unable to join Chaldea quite yet, being in the Atlas Institute on other business - to solve another case as a favour to Charles Babbage. The information they seek is held in the centre of the Atlas Institute, and Holmes agrees to ally with the heroes temporarily to reach it.[17]
The party, joined by Holmes, make their way deeper into the Atlas Institute, fending off its automated defence mechanisms (Holmes unable to fight due to his existence being in flux). As they make their way through the underground maze, Holmes tells Ritsuka of the long history behind the Atlas Institute.[17]
An isolated underground realm for genius alchemists to constantly invent without rebuke, built in the Atlas Mountains of Egypt. Founded on the principle that all inventions created could never be brought outside, its very corridors are magically built to make even leaving difficult. [17]
Filling over 2000 years with countless inventions deemed failed creations, the Institute has become a storehouse of Mystic Codes and terrible weapons of Magecraft. including the Seven Taboos, forbidden weapons capable of destroying the world. Yet, the Institute would only cooperate with those holding one of Seven Contracts, of which only four have been recovered.[17]
Holmes notes the Institute's current director, Zepia Eltnam Atlasia, with an unknown successor designated, and as with the Clock Tower in the London Singularity, it is currently deserted. He compliments Ritsuka's leadership, noting their unique ability to maintain perpetual contracts with a large number of Servants. [17]
Mash and Ritsuka, at Holmes' request, recount their encounter with the King of Mages, upon learning that they are key witnesses. They note Solomon's erratic personality, and Holmes deduces that Solomon reflects the personality of whoever he is interacting with. He further deduces that the Incineration of Humanity was merely a single aspect of Solomon's plan, and that he is already occupied with a new, unknown task - explaining his complete indifference to Chaldea's meddling.[17]
As they approach the centre of the Institute, Holmes cryptically warns the heroes that he deliberately chose to appear to them where Chaldea cannot see them - declaring that he does not trust Dr. Roman.[17]
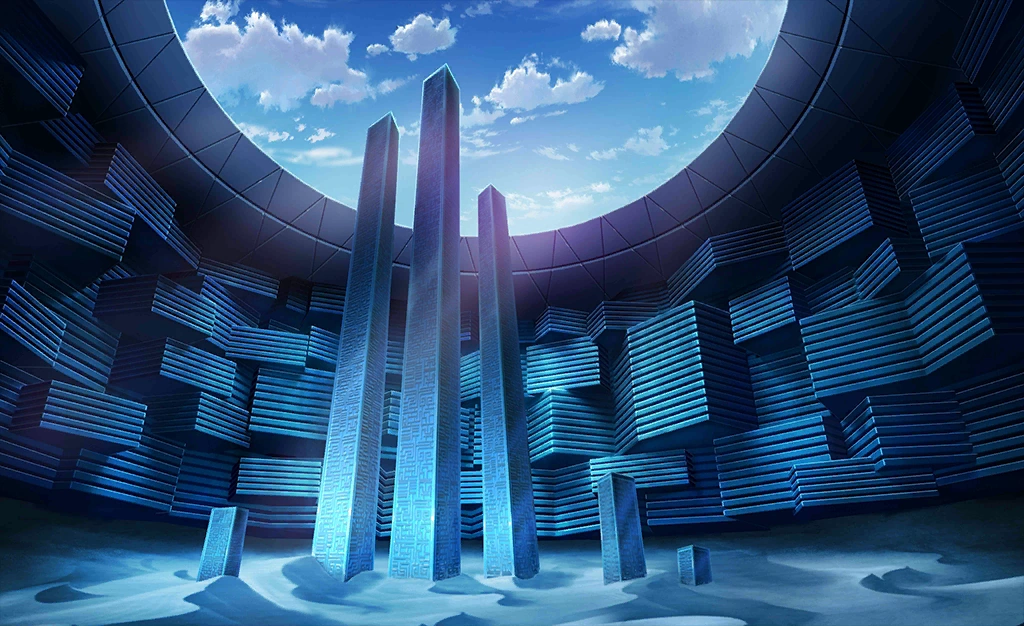

Atlas Institute
The party enter the highly advanced chamber marking the centre of the Atlas Institute, resembling Chaldea's Command Room. At its centre stands the obelisk-like TRI-HERMES, the Pseudo-Spiritron Calculation Engine from which Chaldea's TRISMEGISTUS is based, containing records of all events. Holmes reveals that the Atlas Institute is in fact the Institute from 2016 (NA: 2018), brought into the Singularity. It is in fact the foreign body detected by Da Vinci earlier, with its absent staff already incinerated by Solomon.[17]
Holmes accesses TRI-HERMES, searching data on the 2004 Holy Grail War in Fuyuki, the source of Singularity F. He reveals from the records that Marisbury Animusphere, the first Director of Chaldea and father of Olga Marie, not only participated in, but was the victor of the Fuyuki Holy Grail War. [17]
Holmes deduces that Marisbury used the Grail to obtain a great fortune with which he used to build Chaldea and its technologies, a means to an end. For unknown reasons, Chaldea caught the eye of Solomon's agent Lev Lainur, who infiltrated it, Holmes pondering if Lev manipulated an unaware Marisbury as a third party.[17]
In addition, Marisbury is revealed to have had an assistant with him during the War - an assistant who was later invited to join the staff of Chaldea the following year as head of the medical division: Romani Archaman. With Roman's own personal history being completely unknown, Holmes is suspicious of Roman, but has no time to use TRI-HERMES to learn more. Regardless, he asks the heroes to keep what they have learnt secret from Roman. [17]
With that, Holmes reveals the next revelation found from TRI-HERMES, despite Bedivere's protests - The True Name of the Heroic Spirit within Mash: Sir Galahad, Knight of the Round Table, the sole Knight who succeeded in the search for the Holy Grail. [17]
The eponymous Round Table itself is revealed as Chaldea's original summoning catalyst and the basis of its Heroic Spirit Summoning system; fused with Mash, it currently acts as the very shield she uses to fight. Though her Noble Phantasm must still be unlocked, Mash is overwhelmed but filled with happiness at the revelation, grateful to Galahad for saving her life.[17]
With a single search remaining before TRI-HERMES runs out of power, Holmes uses the Engine to find the true nature of the Lion King's sacred lance, Rhongomyniad.[17]
Rhongomyniad's nature as the Tower at the Ends of the World is revealed: a great pillar of light piercing the planet, pinning the very Texture of the world to the planet's surface as it stands at the edge of the world. The lance the Lion King holds is merely a shadow of this Tower, a terminal that allows the Lion King to utilize the tower's Authority.[17]
The truth of the Lion King's plan becomes clear: the magically-constructed Holy City is not Camelot - but the outer shell of Rhongomyniad itself. Able to hold up to 500 souls, the Lion King intends to save only the purest of humanity, sealing them within the Holy City to be saved in an ideal utopia. However, after the plan's final phase, consisting of transforming the Holy City back to the Tower at the Ends of the World, the souls within will be unable to live as humans. Instead, they are preserved for eternity, stored akin to biological samples on display, a fact that horrifies the heroes.[17]
In addition, by returning the Holy City to the Tower, the surrounding area will by definition become the "Ends of the World". As a result, the outside world will be completely destroyed with all who live in it, a process that has already begun. Sanzang corroborates this, revealing that nothing exists past the Egyptian desert.[17]
It is this that is behind the Singularity being completely separated from human history. Holmes concludes that the Lion King is willing to destroy one of the Foundations of Humanity to create her own utopia, a threat now completely distinct from Solomon.[17]
With the stakes of their mission now clear, the heroes rush to leave the Institute, emboldened on their quest to stop the Lion King. Fighting past more Atlas defence mechanisms, they reach the exit in record time. There, Holmes prepares to take his leave, chasing another case concerning a certain Phantom Spirit. [17]
Before bidding the heroes farewell, Holmes points out to them a crucial oddity in Solomon's plan - his strange but deliberate choice to enact his plan specifically in 2016 (NA: 2018) AD. He deduces that Solomon chose that year out of necessity as opposed than want, making a worrying conclusion with Ritsuka that Solomon could not see beyond 2016 (NA: 2018) with his Clairvoyance.[17]
With that, he parts way with the heroes as they leave the Institute, announcing his desire to meet again.[17]
The God King Ozymandias[]
(1/3)[]
The heroes emerge from the Atlas Institute to find Lancelot and his unit waiting for them, the sandstorm having died down. Bedivere appeals to Lancelot, believing him and the other Knights to be unaware of the Lion King's true plan. He is surprised, however, to learn that he is wrong, and Lancelot remains steadfast in opposing the heroes, attacking Bedivere.[18]
Lancelot reveals that the Lion King announced her true intentions to the Knights the moment they were summoned, and chose to obey her of their own volition despite her inhuman actions. Suddenly, Mash flies into a rage, disgusted by Lancelot's words, and forces him back. Backed by Galahad's own power and feelings, Mash Ascends in strength, and challenges Lancelot personally to a duel. [18]
She shames his unchivalrous actions in not opposing the King despite finding her actions wrong, and announces her True Name as Galahad. Lancelot, Galahad's father in life, is left completely flabbergasted. Despite his Gift of Ferocity, Lancelot is soundly bested in battle, and concedes defeat to the heroes. He offers to escort the heroes to a secret location as recompense, and they accept. [18]
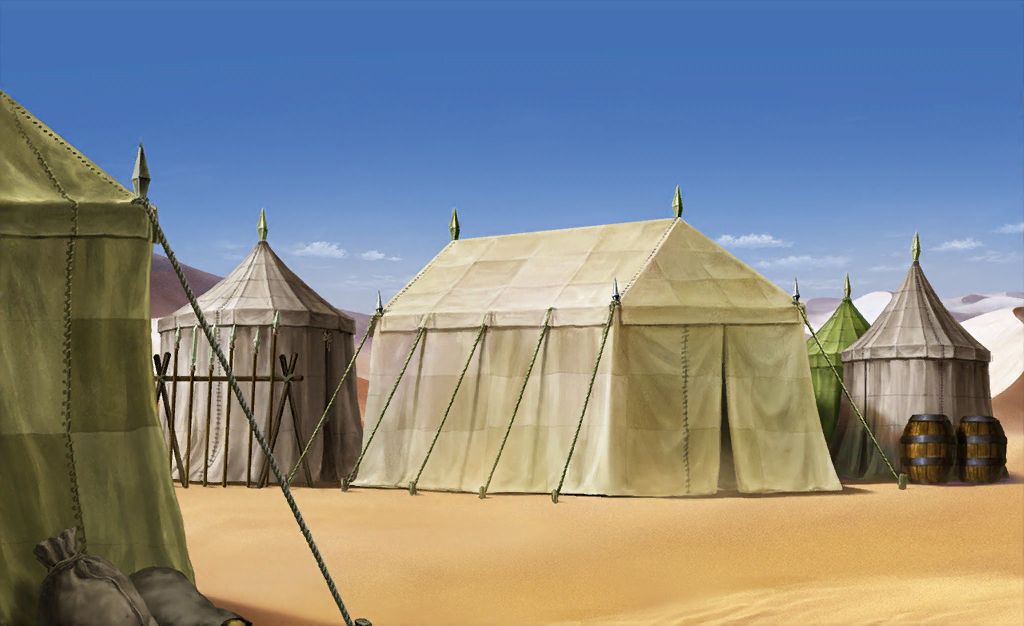

Lancelot's hidden refugee camp
A half-day of travel leads the heroes to a hidden campground village near the mountains, filled with refugees. It is revealed that Lancelot had been rescuing and sheltering refugees not chosen in the Holy Selection, saving them from execution. Guarded by Knights who disobeyed the Holy City and escaped, Lancelot has gathered his own private army completely in secret.[18]
The heroes' surprise at Lancelot's great treason turns into dumbfounded delight when none other than Da Vinci, alive and well, appears to greet them.[18]
(2/3)[]
Roman reconnects just in time to see Da Vinci's return, and reveals that he knew all along and kept silent to read the room. Da Vinci explains that Lancelot had saved her from her own explosion, attracted by Da Vinci's beauty (much to Mash's dismay), before taking her to recuperate at his hidden camp.[18]
Furthermore, Da Vinci reveals that Saruhan had also assisted her, helping assist the opposite group of refugees in the escape from the Holy City Gate. After leading his group to Lancelot's camp, he has been acting as Da Vinci's informant in the wastelands, providing her news of the heroes' exploits in exchange for her knowledge. Mash provides Roman with their findings from the Atlas Institute, withholding any mention of Holmes or the revelations about Chaldea.[18]
After a brief duel to train with Da Vinci, Ritsuka and Mash recount their findings on Rhongomyniad to her. Together, the party discuss the Lion King's inhuman nature. Sanzang notes that the Knights of the Round Table chose to obey her out of loyalty to the original King Arthur, unaware she has become an altogether different person. [18]
Lancelot reveals that the Lion King was already in her current form when the Knights were summoned, and does not believe that she was corrupted by Solomon (instead suspecting her to be a puppet of Agravain). Da Vinci deduces that King Arthur was transformed into the Lion King by prolonged exposure to Rhongomyniad, ascending beyond a Heroic Spirit to becoming a Divine Spirit, as a Goddess. Even if Solomon is stopped, the Lion King will still remain a threat to humanity if not defeated.[18]
With Lancelot unable to directly betray the King due to his Gift, Ritsuka suggests their next course of action to bolster their strength: seeking an alliance with King Ozymandias. Despite the others' protests, Lancelot is optimistic, noting that Ozymandias's territory is also in danger from the Lion King's plan. Noting Ozymandias's personality as simple-minded, he believes he can be convinced if the heroes can prove their value and ability to win.[18]
The next stage of the plan is decided. Bedivere is sent to the eastern village with Saruhan to contact Cursed Arm and the mountain people and inform them of the alliance with the Sun King. The rest of the heroes prepare to cross the desert to meet Ozymandias and secure said alliance. With 40 Raider Knights joining their party, the rest of Lancelot's forces will await word from Bedivere before moving to stand by in the hidden valley near the Holy City.[18]
Using Da Vinci's new ornithopter, the Bastinyan, the party sets out across the sandstorm-covered desert, escorted by Touta, Lancelot and his unit. They fight past more mysterious octopus-like monsters, and approach Ozymandias's temple as night falls. Da Vinci and Ritsuka privately talk, and the former deduces that Ritsuka and Mash are hiding something from Roman. Disconnected from Chaldea in the desert, Ritsuka reveals their findings on Roman to Da Vinci.[18]
Da Vinci, having been summoned much later than Galahad or the Fuyuki Grail War, admits she was unaware of Marisbury and Roman's relationship. Though she was angered by the experiments on Mash, she admits that she stayed in Chaldea because of Roman. Feeling sympathy, she realised Roman was shouldering a massive responsibility without telling anyone, despite only being human.[18]
She assures Ritsuka that Roman is an ally, and hints that he is hiding a trump card of his own to grant one wish, but one that will cause him to disappear if he does.[18]
(3/3)[]
The following day, the heroes gather outside Ramesseum Tentyris, Da Vinci sending an aggressive challenge to Ozymandias to win his alliance. Guardian beasts emerge from the temple gates, and the heroes charge, their resolve emboldened to fight their way to an audience with Ozymandias if necessary.[18]
Inside the throne room, an amused Ozymandias ponders the heroes' return with Nitocris, as well as her repeated assistance to them. Despite Nitocris's reassurances, Ozymandias laments his decision to safeguard the Grail, noting that despite his best intentions to prevent further ruin, his decision has stifled his own freedoms. He offers the Grail to Nitocris, with her status as a Pharaoh and an incarnation of Horus making her suitable, but she declines out of loyalty to him. [18]
Impressed, Ozymandias orders Nitocris to confront the heroes herself. As Nitocris leaves, he ponders the King of Mages' plan, wondering what he would choose given the choice of waiting for extinction or fleeing it like the Lion King.[18]
While Lancelot and his men hold off the temple guards, the heroes manage to infiltrate the temple, making their way for the throne room. Sanzang notes that the temple feels similar to the Holy City, and guesses that Ozymandias intends to use it as a shelter for his people, much like the Lion King. Nitocris confronts them, proclaiming that Ozymandias will not flee, and that she will be the one to defend the temple against Rhongomyniad with her Mirror if necessary.[18]
Nitocris challenges the heroes to a final trial to earn an audience with Ozymandias, summoning warrior spirits from her Mirror of the Underworld to do battle. The heroes manage to best and subdue Nitocris, and they make their way into the throne room, confronting King Ozymandias for the second time.[18]
Ozymandias initially mocks their proposal for an alliance, but Da Vinci notes that by allowing them an audience, he has already accepted it. Ozymandias allows Sanzang to question him, out of respect for her feat in crossing the Egyptian desert. [18]
Sanzang praises Ozymandias for prioritising the lives of his people, but accuses him of now choosing to abandon his duty by refusing to fight the Lion King. Ozymandias admits that he believes that due to the Incineration of Humanity, conflict with the Lion King is futile even if victory is achieved. As such, he summoned the Egyptian desert to seal off his territory and shelter only his people within it, abandoning the rest of the world to ruin.[18]
Angered, Sanzang accuses Ozymandias of being the same as the Lion King, challenging him to save the world instead of only his people. Ozymandias is left speechless, but soon laughs off her argument. Lamenting that as a tyrannical king, his role is not to save the world even if he wanted, he challenges the heroes to prove they have what it takes to do so.[18]
With that, he pours his blood into the Grail and drinks it, incarnating as the shadow of the Demon God residing within it - Aamon of the 72 Demon Gods. Ozymandias further grants Amon the new True Name of Amun-Ra, temporarily granting it the Divinity of the great Egyptian god enshrined and worshipped within the temple. [18]
The team engage Amun-Ra in battle, now a Divine Spirit with power beyond that of a regular Demon God Pillar. The heroes prevail, only for Amun-Ra to instantly regenerate, empowered by an infinite magical energy supply from the temple complex. Sanzang chooses to get serious, unlocking the full power of her forbidden Buddha Palm technique. [18]
With Sanzang at full strength, the heroes defeat Amun-Ra for good, and he reverts back to Ozymandias, satisfied that the heroes are able to stand against the Lion King. As Nitocris returns to the throne room, Ozymandias challenges the heroes to one final trial - a fight against both himself and Nitocris, now to prove whether they can fight beside him and his army.[18]
The heroes succeed, besting Ozymandias, Nitocris, their Sphinxes, and images of Ozymandias summoned by Nitocris, and finally earning his trust. Ozymandias concedes to Sanzang's argument, admitting that by safeguarding the Grail, he had become narrow-minded. He rewards the Grail to Ritsuka and Mash, but notes that only the Lion King's defeat will correct the Singularity this time.[18]
While he notes that he may not fight personally, he lends the heroes command of his Divine Beast Corps, his personal army of Sphinxes. However, Ozymandias is surprised upon learning that the heroes acted on the First Hassan's behalf. It is revealed that Ozymandias is wary of the First Hassan as much as he is of the Lion King, and he is the reason why Ozymandias did not wage all-out war on the Lion King.[18]
Ozymandias recounts that after he began expanding his desert, fighting against the mountain people, the First Hassan ambushed Ozymandias in his throne room and decapitated him before he could realise his danger. Due to the magical energy supplied from the temple, Ozymandias was able to survive and slowly regenerate (explaining his loose head from Chaldea's first encounter with him). [18]
Left with a deep respect for the First Hassan from this experience, he admits that had the heroes informed him of their alliance with the First Hassan from the beginning, he would have joined them without question.[18]
The Eve of the Decisive Battle[]
Outside the temple, the heroes and Ozymandias inform Lancelot of the good news. Lancelot tasks Ozymandias's army with marching in to attack the Holy City's west wall, preparing for a simultaneous assault on the City four days from then at the break of dawn. [19]
With Ozymandias lending Lancelot his beast trainers, the heroes return to the east village gathering just in time for the day before the last battle. There, they reunite with the Hassans and Bedivere, who have rallied seven thousand mountain people and two thousand Holy City deserters to the cause (including the soulless man Ritsuka and Mash offered water to from the wastelands).[19]
Rushd greets Ritsuka and Mash, asking after Arash. They lie, stating that Arash has gone ahead, and it becomes clear that Rushd already knows Arash's fate, only pretending to remain positive for their sake. Going over their battle plan, Lancelot offers to lead the mountain army through patrol blind spots in the wasteland mobilisation. [19]
With the full army making their approach through the night, they aim to attack at dawn. There, they will force their way into the Holy City, while Ritsuka's group will be tasked with breaching the castle and defeating the Lion King. Their battle plan settled, the three Hassans challenge Ritsuka and Mash to one final duel to prove their ability, and they are satisfactorily bested.[19]
After night falls, Ritsuka talks with Sanzang, who is still chronicling her adventures, in private. She affirms that after her prior hesitation, she is now fighting to stop the Lion King with certainty. She considers asking Ritsuka if she can come to Chaldea, but stops herself out of embarrassment.[19]
Meanwhile, the others are celebrating in a final dinner before the march (Serenity mired in an intimate dream involving Ritsuka). While putting Rushd to bed, Mash and Rushd share a final farewell, Rushd revealing that he had known his mother's true fate from the beginning. However, he thanks Mash for saving him, promising to live on to preserve his mother's memory, and one day go to the Holy City himself to say his goodbyes to her.[19]
Touched, Mash relates her experience to Cursed Arm, who regards Rushd fondly. He notes that as the Hassan of the current era, he will likely remain after the Singularity is resolved, unlike the other Hassans. As such, he decides to continue looking after the mountain people while he can.[19]
Meanwhile, Da Vinci and Lancelot have a final tactical meeting regarding the final assault. Lancelot explains that the Holy City's main gates are impervious to any evil or ill-intentioned attacks. With seemingly no way to breach them, they plan to scale the City's walls instead while Ozymandias's Sphinxes act as a diversion.[19]
Lancelot voices his suspicions that Agravain is manipulating the Lion King from the shadows, acting for his own self-interests. Da Vinci is not convinced, believing that Agravain is, in his own way, acting purely for the Holy City's benefit, if seemingly out of spite.[19]
Mash finds Bedivere alone, witnessing him crying. They converse in private, where Bedivere admits he is afraid of finally meeting the Lion King, after his many years of travel. After Bedivere wonders if Mash is the same as him, Mash confides in him her own similar fear of fighting, and fear of failing her friends and Chaldea.[19]
However, Mash continues, relating her near-death experience in the bombed Chaldea Command Room. After being saved by Ritsuka, a regular human who sought to comfort her despite fearing death themselves, Mash came to deeply treasure that memory. Mash realises that after that moment, Galahad chose to entrust his power to her, approving of Ritsuka and regaining faith in the goodness of humanity. [19]
Despite having a fear of fighting, it is that memory and trust that gives Mash a drive to live and fight - for the sake of that beautiful moment, and people with the same goodness in them.[19]
Bedivere gains a deep respect for Mash, and apologizes to her for presuming them to be the same in their self-doubt, complimenting her as having the conduct of a true Heroic Spirit. Bedivere admits that he has committed an unforgivable crime that he is trying to atone for, making many sacrifices on his quest to do so. Only after seeing Ritsuka and Mash's bravery on the night of the Holy Selection was Bedivere finally spurred to stand and fight, disgusted at how pitiful he had become, as opposed to single-mindedly pursuing his goal.[19]
He admits that he is truly afraid of reaching the end of his long journey, fearing its end may be meaningless. Mash assures him with absolute certainty that there will be a meaning and a final salvation awaiting him come the end. A grateful Bedivere gives Mash advice on unlocking her Noble Phantasm; he hints that its true nature is to protect people rather than simply to block, the path to the pure white castle that will never crumble.[19]
Replica[]
(1/5)[]
On the morning of the decisive battle, the Allied Forces are gathered on the wastelands for the final assault. The Holy City awaits beyond, surrounded by its own soldiers gathered in its defence. Lancelot notices to his dismay that Agravain has placed archers along the City walls, foreseeing heavy casualties as a result of them, even with Ozymandias's diversion.[2]
Lancelot, and a mounted Sanzang and Touta will lead the allied Knights as the vanguard (aiming to hold down Gawain), with Ritsuka, Mash, Da Vinci, and Bedivere joining the infantry in assaulting the main gates. Cursed Arm resolves to reach the castle walls to thin out the archers. Lancelot gives his final rallying speech, preparing to charge and begin the final battle.[2]
Suddenly, a skull-faced sandstorm appears from the north, smothering the battlefield and the Holy City, the sound of a great bell ringing in the distance. Sensing no magical signatures, Roman is in disbelief to find it is a natural phenomenon. Cursed Arm realises that it is the work of the First Hassan, providing cover for the army from the castle archers.[2]
With the tide turned in their favour, the Allied Forces charge the Holy City under cover of the storm. The battle begins.[2]
At the main gate, Gawain attempts to maintain order in the chaos of the storm, the allied Servants wreaking havoc on both flanks. Hearing of Lancelot's betrayal, he prepares to face the traitorous Knight himself, but is confronted by the First Hassan-i Sabbah. Gawain arrogantly attacks the First Hassan, but is shocked to find his Galatine easily rebuffed even by his opponent's cloak. [2]
Gawain's folly becomes all too clear - with the First Hassan's sandstorm blocking the sky and sun, Gawain's source of strength and invincibility is nullified, his Gift of Nightless rendered completely useless.[2]
Meanwhile, the Alliance assault on the main gate goes poorly. Even under cover of the storm, the Allied forces are unable to get a foothold with ladders, and even Ozymandias's Sphinxes cannot breach the gates. Da Vinci suggests using Airgetlám, but Bedivere regretfully admits that he physically cannot attack Camelot with Airgetlám. With no choice but to protect themselves, Ritsuka's group are forced to fight off a unit of Agravain's specialised Enforcement Knights.[2]
Elsewhere, the mounted Touta and Sanzang ride as a two-man elite cavalry unit, Touta flooding enemy soldiers with infinite waves of rice. However, as they ride, it becomes clear that the Allied forces are suffering too many casualties. Seeing no other choice to prevent further losses, Sanzang implores Touta to ride for the main gate, charging her Final Buddha Palm, a last suicide attack. [2]
Before Touta can stop her, Sanzang unleashes Five Elements Mountain - Final Buddha Palm at full power - an attack of pure compassion that successfully destroys the Holy City gates, breaching the City and turning the tide. [2]
As the overjoyed Alliance army and Ritsuka's group flood into the breach, Touta carries the dying Sanzang to the west wall. Sanzang voices her wish to go to Chaldea as she dies, and Touta congratulates his mentor for a job well done.[2]
(2/5)[]
Within the Holy City, Agravain receives updates of the battle, learning of the breach of the City gates. Agravain is unconcerned, with Tristan guarding the castle tower and Mordred's unit fighting outside. However, it is revealed that Mordred's unit has already been routed by another group of Knights - and Agravain learns of Lancelot's betrayal.[2]
Ritsuka's team enter the Holy City of Camelot. Inside, as they fight, they find the castle town completely deserted of civilians, Da Vinci suspecting the Selected people have been evacuated elsewhere. Ahead of the Allied Forces by an hour, Ritsuka's team make for the main castle.[2]
In the castle throne room, Agravain informs the Lion King of the City's invasion, and implores her to activate the sacred lance, the Holy Selection now complete. The Lion King obliges, and brings the Tower at the Ends of the World to the Holy City.[2]
After an enormous magical energy response, the main castle is suddenly surrounded by a wall of pure light, blocking the heroes' advance - the exterior of the sacred lance Rhongomyniad. [2]
The collapse of the era begins. The edge of the world witnessed by Sanzang begins to close in, slowly consuming the Singularity's land from the outside in, converging on the Holy City.[2]
(3/5)[]
The appearance of the wall of light tips the scales of battle once again, the Allied Forces now being pinned at the front gates. [2]
Ritsuka's team is confronted by Mordred, who had abandoned her unit outside to personally hunt down the heroes, Arash in particular. She is disappointed to learn of Arash's sacrifice, and attempts to challenge the heroes regardless. Bedivere refuses, and condemns Mordred as a disgrace for her reckless lack of care for her own life and her men, a contrast to her normally cruel but dutiful personality.[2]
Angered, Mordred remains fervently devoted to the Lion King's cause, willing to fight and die for her father's ideal of a city without war. Jealous of Bedivere for having more honour over her, and being at Arthur's side to the end, she engages the heroes in a fight to the death.[2]
Even with Mordred's Gift of Rampage still being active, the heroes prevail, and Mordred is fatally wounded. Bedivere apologizes for treading on Mordred's dream - that deep down, she had longed to serve her father faithfully, despite being doomed to her fate as the Knight of Treachery. Mordred concedes defeat, and disappears, the first of the enemy Knights of the Round Table to be vanquished. Despite their great victory, however, the heroes are still unable to find a way to breach Rhongomyniad's wall of light, left without options.[2]
Meanwhile, far from the battle, in Ramesseum Tentyris, Nitocris informs Ozymandias of Rhongomyniad's appearance and activation. Wishing to reward Ritsuka for their efforts, Ozymandias decides to offer assistance of his own. Diverting the temple's magical energy and defences, Ozymandias activates the temple's main weapon - the Great Lightbulb Dendera, Nitocris ready to block any retaliation from the Lion King with her Mirror. [2]
Ozymandias fires a blast from the Dendera, an ultra-long-range beam of divine punishment across the desert at the Tower of Rhongomyniad itself. However, it fails to breach the wall of light, and Ozymandias fires a second shot, using his own Spirit Origin to fuel the weapon. [2]
The Dendera successfully strips away the walls of magical energy surrounding the City and exposing the Tower, at the cost of Ozymandias beginning to fade away. However, before he can fire the decisive shot, the Lion King retaliates, unleashing the Light of Judgment at the pyramid temple. [2]
Nitocris uses her Mirror of the Underworld to physically block the Light's descent, sheltering the temple. Ozymandias taunts the Lion King for leaving herself exposed by attacking him. Using the last of his strength, he unleashes the full might of Ramesseum Tentyris on the Tower, ramming it with the entire mass of the temple complex as his final Noble Phantasm.[2]
The Tower at the Ends of the World is destroyed completely. Nitocris attempts to continue to shelter the crumbling Ramesseum Tentyris with her Mirror, offering her own soul to the Underworld to do so. Ozymandias stops her, noting her Mirror is already broken. Accepting his end, he implores Nitocris to rest as well, dubbing her a fellow Pharaoh. [2]
The two pharaohs perish together as Ramesseum Tentyris is destroyed, taking Rhongomyniad's pillar of light with it.[2]


Outside the Holy City, as the Allied Forces' morale is raised by the Tower's destruction, the First Hassan concludes his battle with Gawain. Calling off the sandstorm, the First Hassan allows the sun to return, deeming his work done. Gawain, his power returned, attacks the First Hassan at full strength...
...only to be completely rebuffed yet again. Amazed, Gawain realises the First Hassan's power rivals even the Lion King, and demands to know why he had not stopped the Lion King from the beginning. The First Hassan asserts that he merely follows the will of heaven, which has determined that Gawain is innocent, and that the heroes will be the ones to defeat the Lion King. [2]
Before vanishing, he implores Gawain to hurry to the castle if he wishes to confess the last sin within his heart. Heeding the First Hassan's words, he tasks his men with sending themselves home if the battle goes poorly, before abandoning the gate and heading for the castle.[2]
Inside the now-burning castle town, the heroes witness the wall of light's destruction, their path reopened. Roman informs them that the sacred lance is still active, only its "sheathe" being destroyed, and the era's collapse will not stop until the Lion King is defeated.[2]
The heroes are joined by Lancelot, who informs them that the Alliance Army has total control of the City's front, the lance's destruction and Gawain's sudden absence shattering enemy morale. For the assault on the main castle, the team split up - Ritsuka's group entering directly through the front, and the mounted Lancelot going through the back entrances, still hunting Agravain in particular.[2]
Bedivere notes that despite Agravain inspiring unwarraned hatred from those around him, he was still a reliable advisor, and ultimately necessary for Camelot's success. Mash adds that Galahad agrees, having felt reassured after meeting Agravain at the Round Table fort.[2]
Suddenly, Bedivere barely dodges an errant snipe from Sir Tristan, irritated by Bedivere's praise for Agravain. The heroes battle Tristan once again, Bedivere now assured the dear friend he once knew is long gone. Despite their best efforts surprising Tristan, with the murderous Knight focusing on defence, the heroes still fail to defeat him. Left at a deliberate stalemate, Tristan aims to simply delay them to allow the Lion King to complete their plan.[2]
However, Cursed Arm, Hundred Personas, and Serenity ambush Tristan, holding him back to allow the heroes to continue. Declaring Tristan as their personal prey for the atrocities committed on their people, the three Hassans assure Ritsuka that they have a plan to kill Tristan. They bid the heroes good luck as they leave, and engage Tristan in battle.[2]
(4/5)[]
Ritsuka's group fight their way past the last of the Enforcement Knights to the royal castle, Lancelot having already breached the back entrances. Meanwhile, the Hassans' battle with Tristan rages on, Tristan managing to kill over 95 of Hundred Personas's bodies. The Hassans reveal their trump card - Serenity's Zabaniya: Delusional Poison Body, the fight with Hundred Personas and Cursed Arm being a mere distraction to allow her poison to spread across the entire area.[2]
Tristan, a Knight who fell to poison after betraying his lover Iseult, is known to the Hassans as critically weak to poison. Unexpectedly, an amused Tristan is completely unaffected, and he kills Serenity and the surprised Hundred Personas, revealing his Gift as her last body dies. While originally meant to turn him into a beast by removing any doubt in his heart, his Gift of Reversal had the side effect of rendering poison, his fatal weakness, completely ineffective on him.[2]
Tristan easily overpowers and gravely injures Cursed Arm. However, Cursed Arm reveals and manages to grab Tristan with his cursed right arm. As a last desperate measure, Cursed Arm removes the curse on his arm containing Shaytan's power, unleashing it on Tristan. Freed from Hassan's control, the arm acts on its own as Shaytan itself, slowly devouring the trapped Tristan. [2]
Cursed Arm admits his respect for Tristan's technique, but condemns him to hell for his carnage. Tristan is left in disbelief why Cursed Arm would go so far without a Gift, but Cursed Arm rejects him and the Holy City's utopia, proclaiming that the Old Men of the Mountain love and live for the people of the land. [2]
However, Tristan manages to use his free hand to fire Failnaught, severing Cursed Arm's arm, seemingly killing him and freeing Tristan. Already half-devoured by Shaytan, the dying Knight witnesses his cursed self reflected in a mirror. He finds a last moment of amusement in his reduced state, seeing his own villainy now reflected in physical form, before he expires, mutating into a mindless monster - Shaytan incarnated.[2]
Ritsuka's group make their way through the castle. Climbing the stairs and corridors to the throne room, they are met by a lone Sir Gawain, who bars their advance. Gawain remains devoutly steadfast in his loyalty to the Lion King, out of regret for his role in causing King Arthur's death by falling to personal grudges. He reveals that the other Knights summoned by the Lion King, after they rejected her plan, were personally disposed of by the Knights who chose to join the Lion King, including himself.[2]
Gawain declares himself as no longer Arthur's, but now the Lion King's Knight, firmly opposed to Bedivere's quest to save the King. With Bedivere assured their wishes are incompatible, the heroes face Gawain in a final battle, and defeat the Knight for good. [2]
The dying Gawain laments that Bedivere had not arrived earlier, wondering if Bedivere could have saved the Lion King's humanity if he had done so. He condemns Bedivere as he dies, and Bedivere is unable to disagree, admitting he is an unfaithful Knight.[2]
Meanwhile, Lancelot and Agravain duel elsewhere in the castle, with Lancelot easily gaining the upper hand. He declares his intent to make Agravain pay for his apparent treachery, only for an incredulous Agravain to gain a second wind. Applying his Enforcement Knights' Madness Enhancement onto himself, Agravain begins to overpower Lancelot. He admits that though he used King Arthur, and was born by Morgan to overthrow her, he came to believe that Arthur was the ideal King for Britain, and remained loyal to her to the end, unlike Lancelot.[2]
Proclaiming his hatred for women due to Morgan's treachery and Guinevere's infidelity, Agravain condemns the speechless Lancelot as a hypocrite for once again betraying the King, before brutally attacking him.[2]
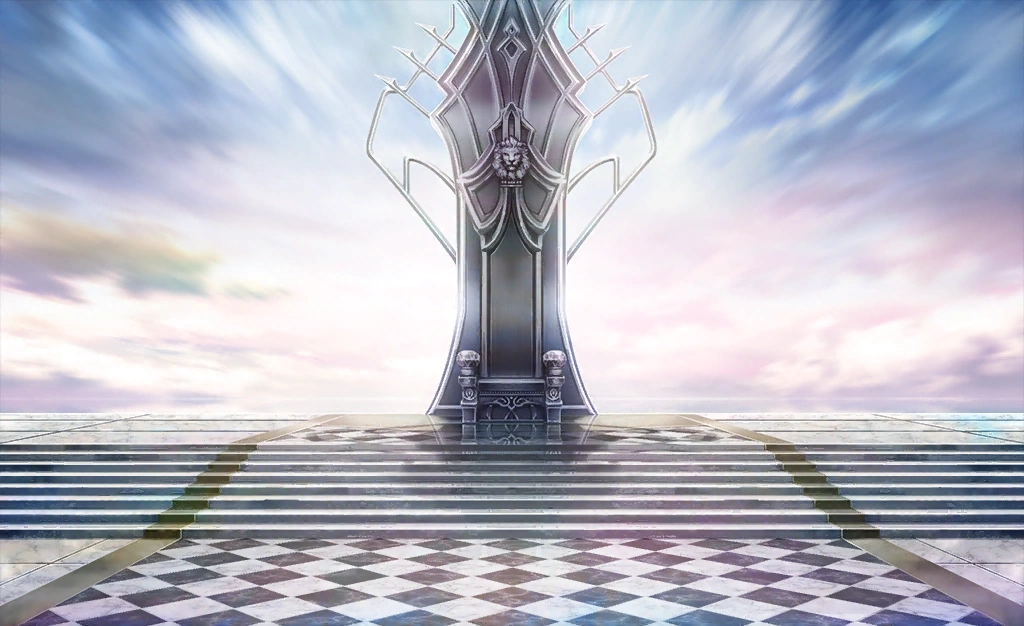

Goddess Rhongomyniad's throne room.
Ritsuka's team approach the highest level in the castle, where the Lion King awaits them in her throne room. The Lion King strips away the walls of the throne room to reveal infinite skies, revealing her to have been waiting in the Ends of the World from the beginning. The Lion King challenges the heroes to battle, but Ritsuka demands her motives for abandoning the world.[2]
The Lion King announces her intent to save humanity from the King of Mages. Preserving the purest souls of humanity in her lance for all eternity, she believes her plan to be a pure motive stemming from her divine love for humanity. Ritsuka angrily rejects her utopia, declaring that humanity are not specimens to be preserved like butterflies on a board. [2]
The Lion King focuses her attention on Mash, asking if at least Mash can understand her ideals. Mash is unable to answer at first, and the heroes do battle with the Lion King, now the Goddess Rhongomyniad, avatar of the sacred lance.[2]
The heroes are unable to best the Lion King, her magical energy even reaching Chaldea and damaging SHEBA. The Lion King declares her plan is the ultimate conclusion to protecting humanity for eternity. However, inspired by Rushd's desire to live for his mother, Mash musters her courage and rejects the Lion King's ideals.[2]
Challenging the Lion King, Mash declares that endings to life are not meaningless, and life will continue to spread and connect all beings despite the tragic losses that will occur. Unfazed, the Lion King challenges Mash to show her resolve, and unleashes the full power of Rhongomyniad on the heroes.[2]
In response, Mash unlocks and unleashes her true Noble Phantasm - Lord Camelot. [2]
(5/5)[]
A flashback to Avalon reveals Merlin's conversation with Bedivere, then known as Lucius. Merlin muses on the Lion King, a alternate incarnation of Arthur who mutated due to a certain discrepancy from proper history. Remaining on Earth and becoming the Wild Hunt itself instead of going to Avalon, she had manifested due to the Singularity's influence.[2]
Bedivere, a possibility from that same terminal world, had appeared at the edge of Avalon as a human-shaped rock before being found by the fairies of Avalon and Merlin. His soul completely exhausted, yet still clinging to life as almost a living corpse, he had appeared again due to the effects of the Singularity.[2]
Giving Bedivere the parting gift of the false Airgetlám, the manifestation of Bedivere's greatest sin, Merlin grants Bedivere a final chance to complete his journey, both knowing he will perish for good at its end. Hiding Bedivere's and Airgetlám's true nature with his Magecraft, he sends Bedivere into the Sixth Singularity.[2]
In the present, Mash blocks the light of Rhongomyniad with her Noble Phantasm, summoning the pure white walls of Camelot itself. However, Bedivere steps forward alone, giving Mash final words of encouragement and advice to keep her heart strong.[2]
The Lion King shows no recognition of Bedivere. In response, Bedivere, his body crumbling, unleashes Switch On - Airgetlám for the final time. He thanks Ritsuka for allowing him to come this far, and apologizing for hiding his secret from them, as the Lion King begins to falter, recognising "Airgetlám's" light.[2]
As Merlin's illusion falls, Roman is astonished to discover Bedivere's true nature - he is not a Servant at all, but a mere human like Ritsuka. Slowly regaining her memories, the Lion King begins to remember Bedivere, "Airgetlám" now revealed to be the King's own sacred sword, Excalibur.[2]
Hailing from an alternate timeline, Bedivere had in fact failed to return Excalibur to the lake all three times, fearful of his King's end. By not returning the sword, his King Arthur was unable to die, and had already disappeared by the time he returned to the forest. Keeping the sacred lance Rhongomyniad, the wandering Arthur was transformed into an immortal King of the Dead. [2]
Bedivere, kept alive by Excalibur's protection, chased after his King for 1500 years in order to atone and return the sacred sword he held. The Lion King, unable to fully remember Bedivere, tries to call upon him to obey her. Bedivere remains steadfast in his duty to strike down his King, who is now evil, and calls upon the heroes to help him in a fourth and final chance to use Airgetlám.[2]
The heroes, standing alongside Bedivere, face down the Goddess Rhongomyniad in the final Grand Battle for the Singularity. A final flashback reveals Bedivere affirming his resolve to Merlin, fighting to finish his journey for the sake of the smile he received from Arthur many years before. As the Lion King is pushed back, Bedivere steps forward one last time. Thanking the Lion King for saving and carrying the burden of Britain for their sake, Bedivere returns Excalibur to her. [2]
Her memories of her last moments with Bedivere restored, the Lion King commends Bedivere for fulfilling her orders as her last and most loyal Knight, as he crumbles away with a smile on his face. The sacred lance is stopped and vanishes, and with the Holy Grail already collected, the restoration of the Singularity begins at a quickened pace.[2]
Despite this, the Lion King still stubbornly wishes to fight. However, she concedes that no time remains to do so, as the heroes slowly begin to return to Chaldea. She reveals to Chaldea that she had acquired the same perspective of the King of Mages, understanding his ideal and purpose. She reveals that his temple resides outside the flow of time, and only retrieving the seventh Grail can reveal its location. [2]
Unlike the past six Grails held by his Demon God agents acting as messengers, the Seventh Grail was sent far into the past by Solomon himself. Able to shatter the very foundation of human history, it is this final Grail that gives Solomon unwavering confidence in his plan, and failing to restore its Singularity will result in incineration no matter what.[2]
The Lion King, though amused, refuses to admit defeat, still believing what she did was right. She challenges Chaldea to follow their own path, and to face the original sin of humankind that lies in the Seventh Singularity - a great evil that may even surpass Solomon himself. She implores them to gather "stars" - the Heroic Spirits they have bonded - to face the Evils of Humanity.[2]
As the heroes return to Chaldea, the Lion King calmly awaits the Singularity's end, admitting that Bedivere has brought meaning to her existence, and his mistake.[2]
Outside the Holy City, the battle is won, Saruhan watching as the Holy City, its Knights, and Touta begin to vanish. Within the castle town, the still-living Cursed Arm is rescued from the incarnated Shaytan by the First Hassan, and Cursed Arm accepts his fate to be executed. The First Hassan unexpectedly spares Cursed Arm, on the technicality that by destroying his eponymous arm, which is still attached to Tristan/Shaytan, he is no longer the Old Man of the "Cursed Arm". [2]
The First Hassan commends Cursed Arm for being the only Old Man to survive past the end of his mission, and leaves. Overjoyed, Cursed Arm resolves to live on and continue to help the people of his era, once again taking his original name - Hanam, the true father of Rushd.[2]
Back at Chaldea, the heroes celebrate their success, Mash declaring that the joy of their journey will remain in their memories even after the Singularity itself disappears. Roman announces the location of the Seventh Singularity, detected in ancient Mesopotamia, 2600 BC, far beyond the era of King Solomon, where a terrible monster awaits that even Solomon himself could not see.[2]
With time needed to prepare for a Rayshift into the distant past, Roman calls Ritsuka and Mash to rest. Before they leave, Roman announces a new addition to the summonable Heroic Spirits - the alternate Sir Bedivere, his deeds now recognised by humanity.[2]
Mash and Ritsuka return to their rooms, Mash overjoyed at Bedivere's return, even if his memories did not remain. Mash admits to Ritsuka that though there will be hardships and sadness, she still considers her journey to have been fun, and that she has become someone she can be proud of, remembering Drake and Sanzang's words to her. She asserts that she knows what she wants to do - to help Ritsuka, from the very beginning.[2]
Within the crumbling Singularity, a mortally wounded Agravain returns to the throne room, having prevailed over Lancelot. The Lion King comforts the dying Agravain, who remains steadfast in trying to fulfil her dreams, unaware the battle is already over. He laments that he failed once again, but the Lion King assures him with a smile that he simply works too much, and bids him to rest. [2]
Interludes[]
| Title(s) | Servant | Notes |
|---|---|---|
| Even If You Have Crossed Through A Thousand And One Nights (Part 7) | Scheherazade | |
| David and Goliath | David | David slays many giant enemies with the help of Ritsuka and Mash, secretly trying to impress his son. |
| The Campaign Shall Never End | Iskandar | |
| What starts with losing | Tristan | After a strange dream, Tristan inexplicably reacquires his Gift of Inversion. Ritsuka, Mash, and the other Knights of the Round Table must cooperate to bring him back to his senses. When he is defeated, Lancer Artoria wonders if this was the work of Morgan. |
Locations[]
Participants[]
Servants
| Designation | Identity | Affiliation |
|---|---|---|
| Caster | Leonardo da VinciWP | Ritsuka Fujimaru |
| Caster | NitocrisWP | Ozymandias |
| Saber (Living Hero) | BedivereWP | Ritsuka Fujimaru |
| Rider | OzymandiasWP | None |
| Saber | GawainWP | Lion King |
| Archer | ArashWP | Ritsuka Fujimaru |
| Assassin | Hassan-i SabbahWP (Cursed Arm) | Ritsuka Fujimaru |
| Saber | MordredWP | Lion King |
| Assassin | Hassan-i SabbahWP (Hundred Faces) | Ritsuka Fujimaru |
| Caster | XuanzangWP | Ritsuka Fujimaru |
| Archer | Tawara ToudaWP | Ritsuka Fujimaru |
| Assassin | Hassan-i SabbahWP (Serenity) | Ritsuka Fujimaru |
| Archer | TristanWP | Lion King |
| Saber | LancelotWP | Lion King |
| N/A | AgravainWP | Lion King |
| N/A | Hassan-i SabbahWP (King Hassan) | None |
| N/A | Sherlock HolmesWP | |
| N/A | Hassan-i SabbahWP (Intoxicated Smoke) | |
| N/A | Hassan-i SabbahWP (Quaking Pipe) | |
| N/A | Hassan-i SabbahWP (Shadow-Peeling) |
Non-Servants
| Designation | Identity | Affiliation |
|---|---|---|
| Demon God (Great God) | AamonWP (Amun-RaWP) | Ozymandias |
| Divine Spirit | King ArthurWP (Lion King) | Camelot |
References[]
- ↑ 1.0 1.1 1.2 Camelot/Zero
- ↑ 2.00 2.01 2.02 2.03 2.04 2.05 2.06 2.07 2.08 2.09 2.10 2.11 2.12 2.13 2.14 2.15 2.16 2.17 2.18 2.19 2.20 2.21 2.22 2.23 2.24 2.25 2.26 2.27 2.28 2.29 2.30 2.31 2.32 2.33 2.34 2.35 2.36 2.37 2.38 2.39 2.40 2.41 2.42 2.43 2.44 2.45 2.46 2.47 2.48 2.49 2.50 2.51 2.52 2.53 2.54 2.55 2.56 2.57 2.58 2.59 2.60 2.61 2.62 2.63 2.64 2.65 2.66 2.67 2.68 2.69 Fate/Grand Order - Camelot: The Sacred Round Table Realm - Section 17: Replica
- ↑ 3.00 3.01 3.02 3.03 3.04 3.05 3.06 3.07 3.08 3.09 3.10 3.11 3.12 3.13 3.14 3.15 Fate/Grand Order - Camelot: The Sacred Round Table Realm - Prelude
- ↑ 4.00 4.01 4.02 4.03 4.04 4.05 4.06 4.07 4.08 4.09 4.10 4.11 4.12 4.13 4.14 Fate/Grand Order - Camelot: The Sacred Round Table Realm - Section 1: Welcomed by the Sand
- ↑ 5.00 5.01 5.02 5.03 5.04 5.05 5.06 5.07 5.08 5.09 5.10 5.11 5.12 5.13 5.14 5.15 5.16 5.17 5.18 5.19 Fate/Grand Order - Camelot: The Sacred Round Table Realm - Section 2: Supper of the Sun King
- ↑ 6.00 6.01 6.02 6.03 6.04 6.05 6.06 6.07 6.08 6.09 6.10 6.11 6.12 6.13 6.14 6.15 6.16 Fate/Grand Order - Camelot: The Sacred Round Table Realm - Section 3: To the East
- ↑ 7.00 7.01 7.02 7.03 7.04 7.05 7.06 7.07 7.08 7.09 7.10 7.11 7.12 7.13 7.14 7.15 Fate/Grand Order - Camelot: The Sacred Round Table Realm - Section 4: The Wailing Wall
- ↑ 8.00 8.01 8.02 8.03 8.04 8.05 8.06 8.07 8.08 8.09 8.10 8.11 8.12 8.13 8.14 8.15 8.16 Fate/Grand Order - Camelot: The Sacred Round Table Realm - Section 5: Taking Flight
- ↑ 9.00 9.01 9.02 9.03 9.04 9.05 9.06 9.07 9.08 9.09 9.10 9.11 Fate/Grand Order - Camelot: The Sacred Round Table Realm - Section 6: Adventure in the Eastern Village
- ↑ 10.0 10.1 10.2 10.3 10.4 10.5 10.6 10.7 10.8 10.9 Fate/Grand Order - Camelot: The Sacred Round Table Realm - Section 7: Mordred, the Raider Knight
- ↑ 11.00 11.01 11.02 11.03 11.04 11.05 11.06 11.07 11.08 11.09 11.10 11.11 11.12 Fate/Grand Order - Camelot: The Sacred Round Table Realm - Section 8: Sanzang Returing from the West
- ↑ 12.00 12.01 12.02 12.03 12.04 12.05 12.06 12.07 12.08 12.09 12.10 12.11 12.12 Fate/Grand Order - Camelot: The Sacred Round Table Realm - Section 9: Flower of Poison, Blade of Iron
- ↑ 13.0 13.1 13.2 13.3 13.4 13.5 13.6 13.7 13.8 13.9 Fate/Grand Order - Camelot: The Sacred Round Table Realm - Section 10: Feast, West Village
- ↑ 14.00 14.01 14.02 14.03 14.04 14.05 14.06 14.07 14.08 14.09 14.10 Fate/Grand Order - Camelot: The Sacred Round Table Realm - Section 11: The Evening Bell of Death
- ↑ 15.00 15.01 15.02 15.03 15.04 15.05 15.06 15.07 15.08 15.09 15.10 15.11 15.12 15.13 15.14 15.15 Fate/Grand Order - Camelot: The Sacred Round Table Realm - Section 12: Village in Flames
- ↑ 16.00 16.01 16.02 16.03 16.04 16.05 16.06 16.07 16.08 16.09 16.10 16.11 16.12 16.13 Fate/Grand Order - Camelot: The Sacred Round Table Realm - Section 13: To the Desert of Atlas
- ↑ 17.00 17.01 17.02 17.03 17.04 17.05 17.06 17.07 17.08 17.09 17.10 17.11 17.12 17.13 17.14 17.15 17.16 17.17 17.18 17.19 17.20 17.21 Fate/Grand Order - Camelot: The Sacred Round Table Realm - Section 14: The Hidden Research
- ↑ 18.00 18.01 18.02 18.03 18.04 18.05 18.06 18.07 18.08 18.09 18.10 18.11 18.12 18.13 18.14 18.15 18.16 18.17 18.18 18.19 18.20 18.21 18.22 18.23 18.24 18.25 18.26 18.27 18.28 Fate/Grand Order - Camelot: The Sacred Round Table Realm - Section 15: The God King Ozymandias
- ↑ 19.00 19.01 19.02 19.03 19.04 19.05 19.06 19.07 19.08 19.09 19.10 19.11 19.12 19.13 Fate/Grand Order - Camelot: The Sacred Round Table Realm - Section 16: The Eve of the Decisive Battle